March 15, 2021
7 instantly actionable office design ideas to brand your workplace. Low-cost office interior decor tips for decorating walls, glass partitions and even floors.
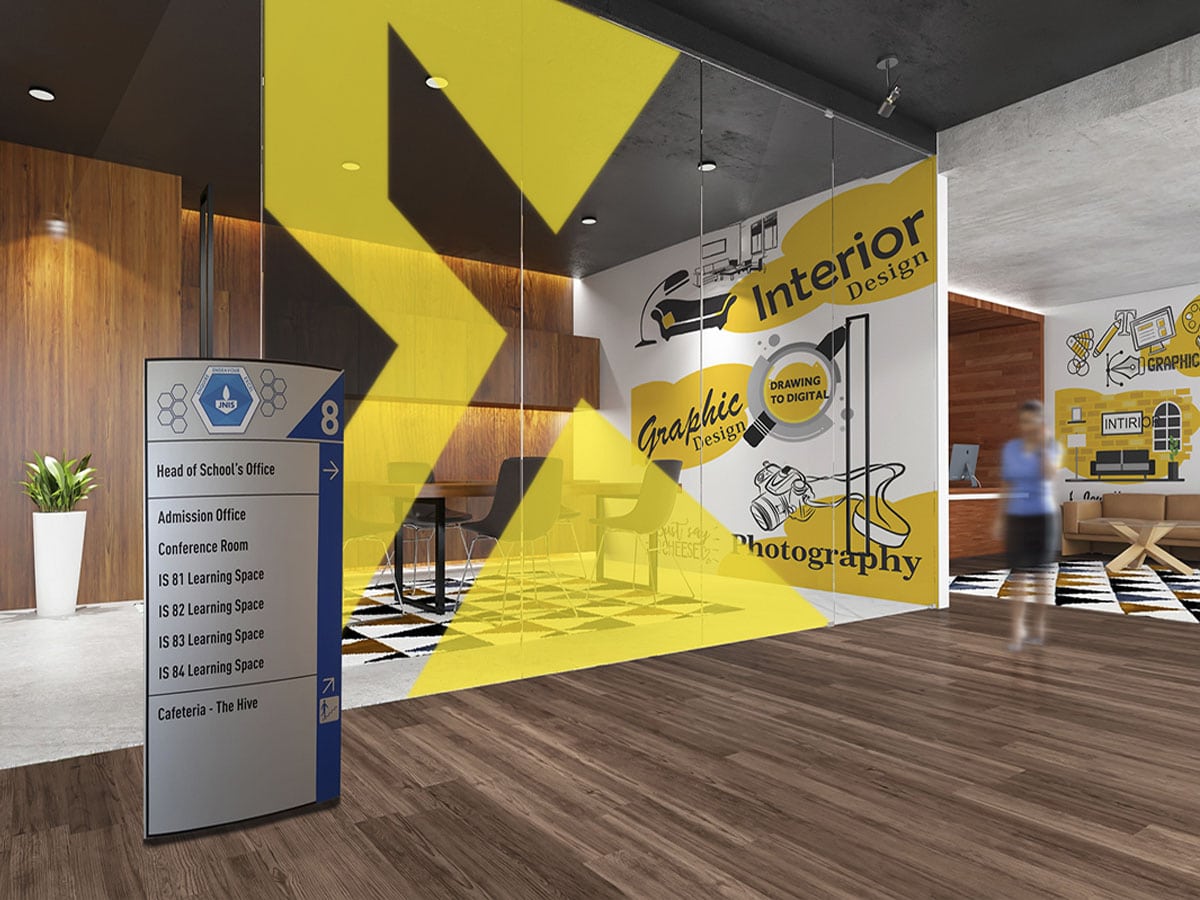
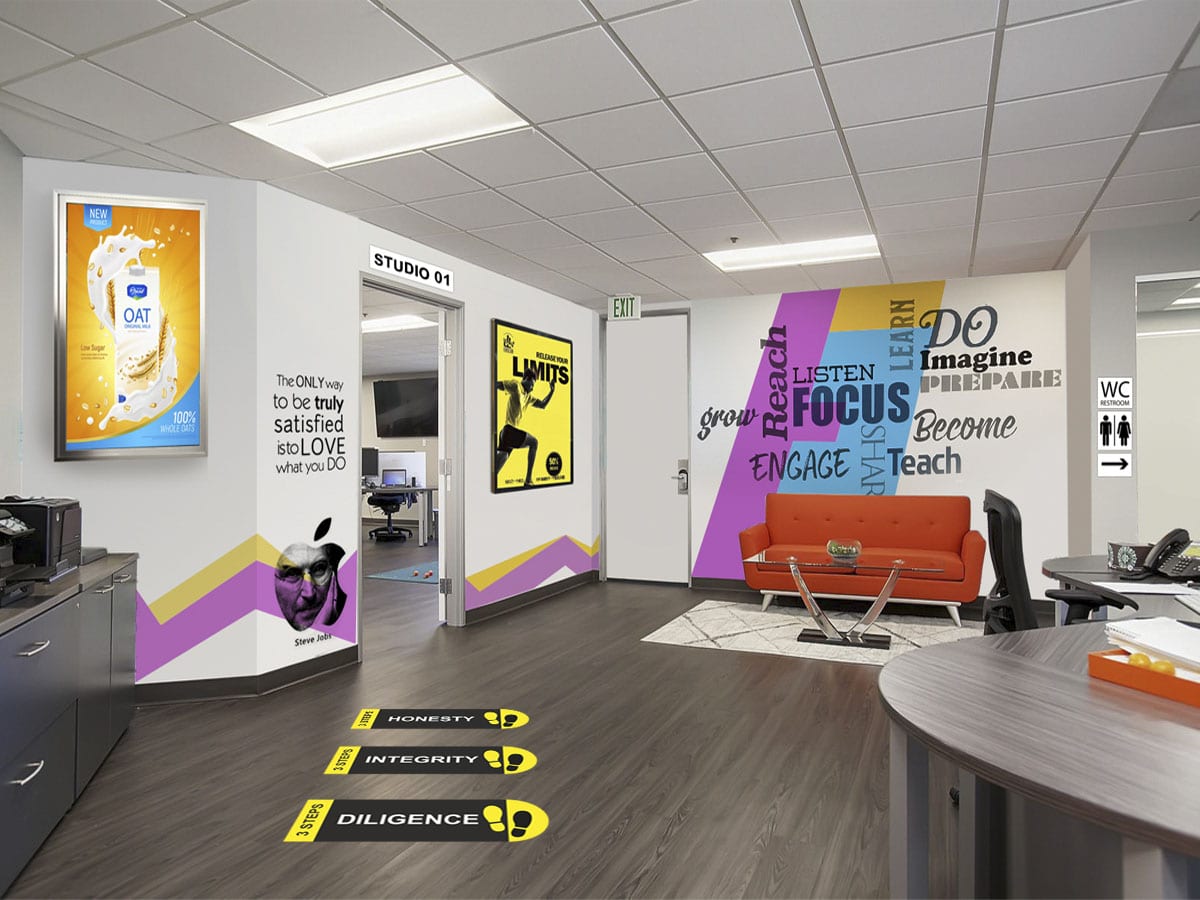
Congratulations. You have just moved into your new office space. And are eager to get your business up and running.
But the walls are bare, the floors empty, and your workspace, totally devoid of any personality.
So you now consider hiring an architect or interior designer.
And you are probably on the right track. Because these guys are great when it comes to painting your walls, fitting light fixtures in the ceiling and designing furniture for the employee workstations.
But hold on for a minute.
Is this all you need to think about? Doesn’t the concept of modern office interiors extend beyond, just the furniture and electrical wiring?
It actually does.
An office environment today, has to be personable, friendly, and conducive to employee productivity. Polished furniture and shiny fixtures look nice but may not be enough to achieve all of the above.
To create a sense of belonging in your workforce, you have to stamp your personality, business philosophy, and even your product imagery, in the workplace.
Breathe some soul into an otherwise impersonal office environment and see both, your employees’ morale and output, skyrocket.
It is not very difficult to achieve personalisation in your office interior designs. Let me illustrate with a simple example.
Traditional interior decor theory dictates that bare walls have to be furnished with paintings or images. And to this effect, most people hang a random picture or a frame holding an abstract print.
But suppose you put up a poster showing an image of the ‘Employee Of the Month’ instead of an impersonal painting. Further, suppose that the fixture in which this poster is framed enables frequent changing/updating.
You will see everybody’s interest spike in the poster showing their colleague’s face. They will also probably work harder to see their own likeness on the wall.
And in case you are wondering, office interior design need not be an expensive proposition. You do not need to spend a whole lot of money to spruce up your workplace.
But what you do need are some ideas and suggestions on how to go about, achieving the same.
And that is the purpose of this post. To give you some office interior design ideas by answering questions like…
01
How do we make a bare wall come alive?
02
Is there a novel way to bring privacy to the glass partitions?
03
What form will my company logo take? Can I light up my logo. Or render the same in 3D?
04
Can we brand ceilings?
05
Or how about advertising on the very floors we walk on?
And so, without further ado, here are seven different ideas on how to bring alive your workspace.
Use them, not only to spruce up your office but also to impress your clients and motivate your employees.

Custom printed wallpapers to adorn your workspace with your company colours and imagery.
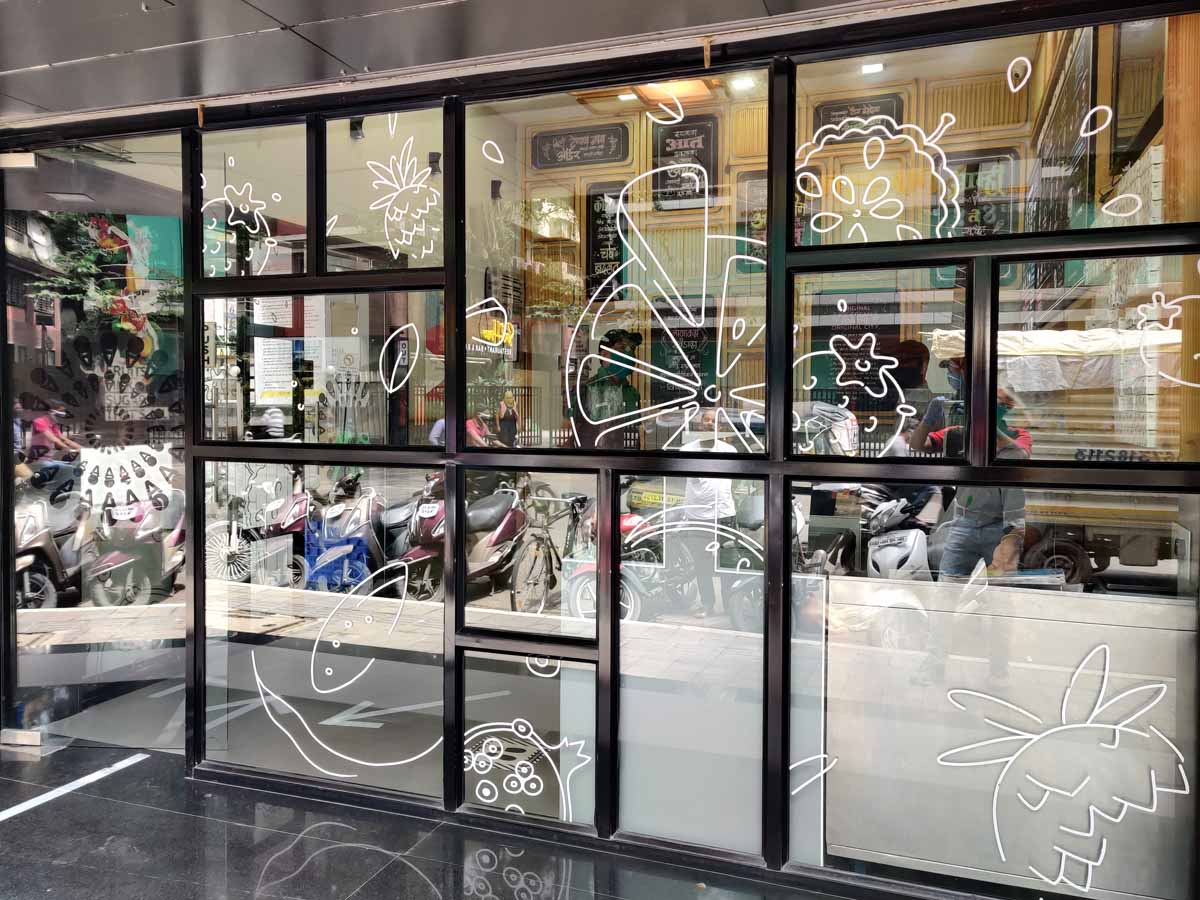
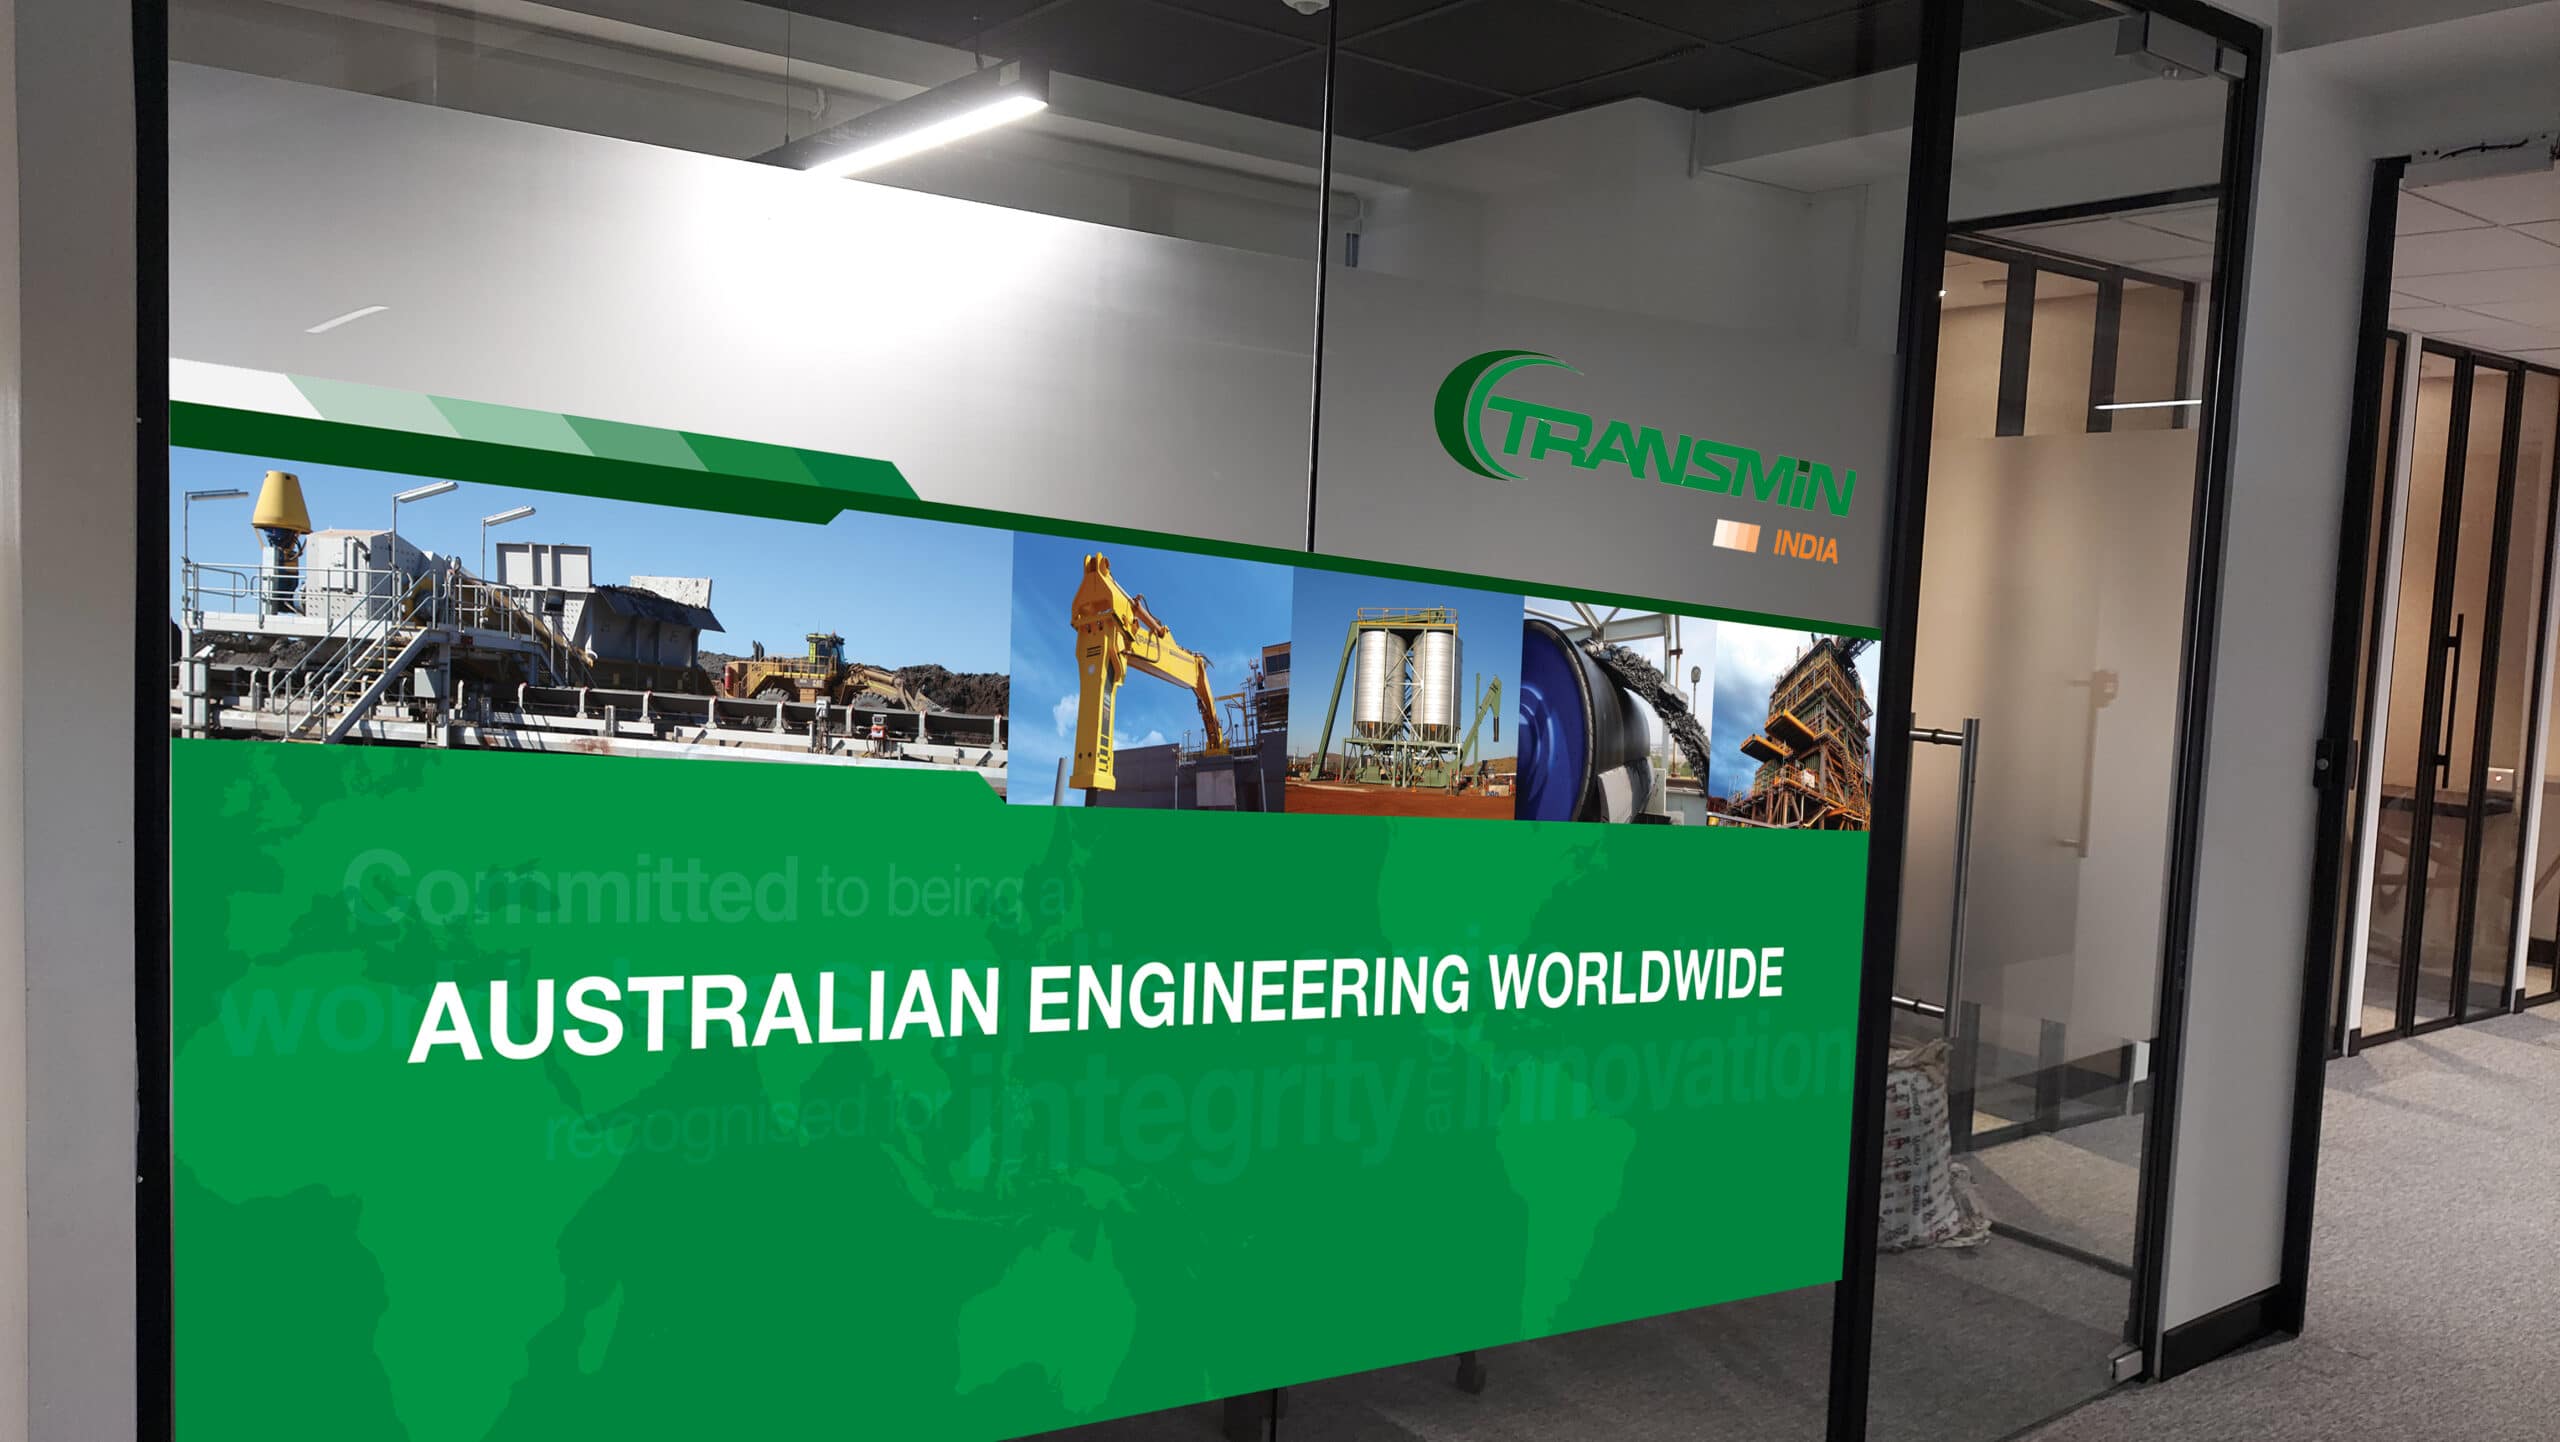
Brand the glass partitions and building facade in your office using these special, printable glass film prints.

Choose from a variety of sunboard, acrylic and backlit poster types. Tastefully display your product images, your company’s scope of services, its philosophy/motto, quotes, and other information.
Use laser-etched plates with a brushed-metal look to display the names of your employees. Choose from gold, rose gold, silver, bronze and copper finishes.

In any given room, you are surrounded by, the walls (duh :-).
But bare walls in any office are a frequently overlooked resource. And they can provide ample opportunity for branding and personalisation.
Let’s assume that you have a sofa in your reception area for seating visitors. Wouldn’t it be wonderful if the wall they face (while waiting), displayed your business wins, or your company tagline?
An even better idea would be for you to showcase a historical timeline of your organisation, the milestones it has achieved over the years and of course, its big wins
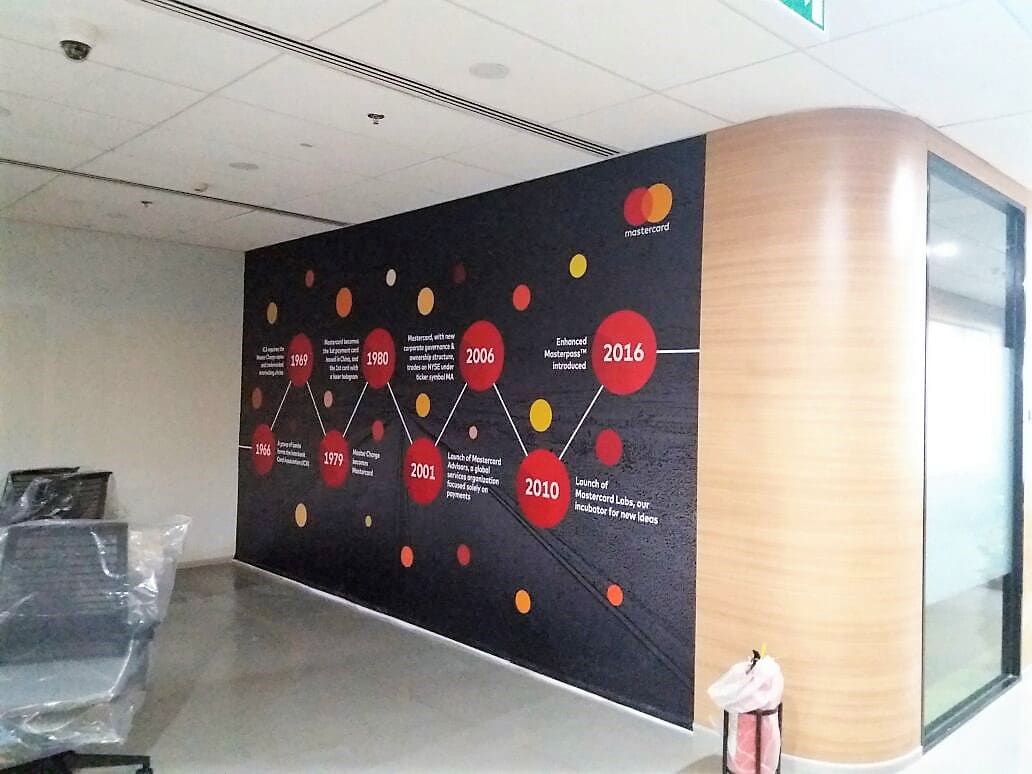
You can actually come up with a variety of ideas to brand your office walls.
Here are some examples for you to consider…
01
Depicting historical timelines and landmarks (if the organisation is an old one)
02
Flaunt corporate achievements and targets
03
Display your company vision, and mission statements
04
Show flattering product imagery
05
Show larger than life images of your team in action
06
Display motivational/inspirational quotes
07
And of course, display your corporate logo.
But a standard wallpaper shop is not going to be able to serve the above-listed content. And there is no way a wallpaper shop can meet our criteria for personalised office decor. A wallpaper vendor can only offer generic designs, patterns, or stock photography.
What you need is a solution that can brand your office walls with your own layouts and content. Designs that incorporate your company’s services, philosophy, and product imagery.
Enter, Custom Printed Wallpapers.
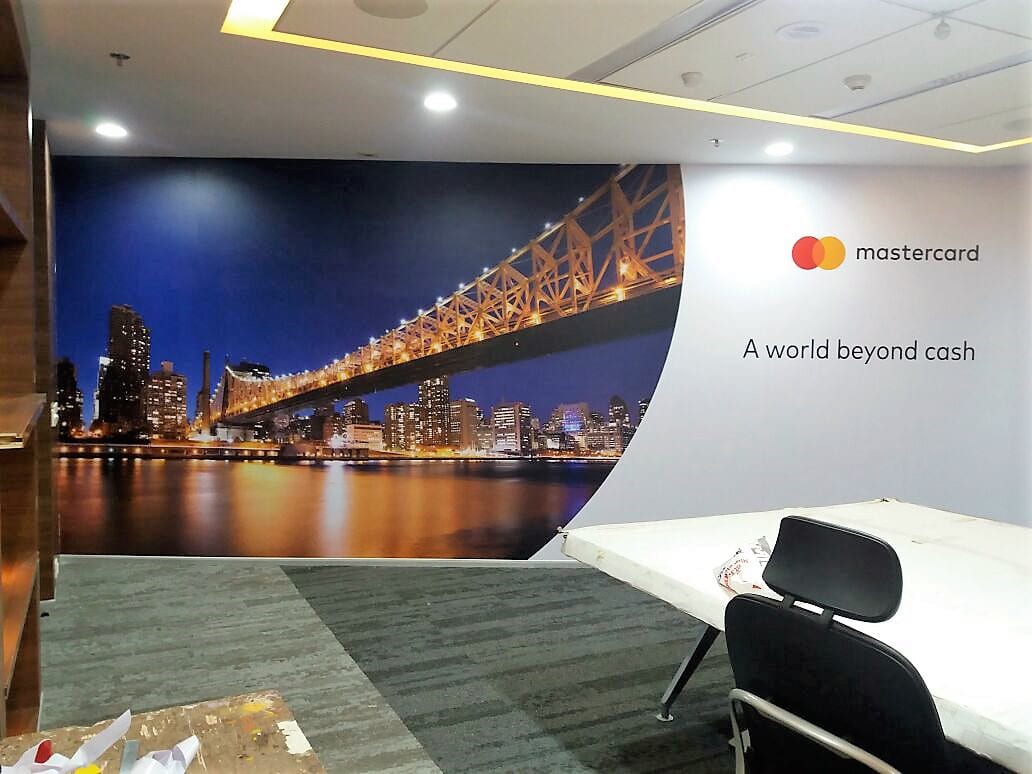
Custom wallpapers are printed at the exact size of the available space on your walls. You supply the content/design, and a print service bureau reproduces the same on specialised wall vinyls. These high-resolution prints are then pasted directly onto the walls of your office.
Two things separate customised wallpapers from other generic prints.
01
Their large size
02
And, their stunning resolutions
Customised wall prints can be generated for walls ranging from size 4 feet to 40. And even wider. So, print shops use specialised wide format printing machines to achieve these larger than life, print sizes.
Moreover, since we are using these wallpapers as office interior decor elements they will be subject to close-up viewing, and scrutiny. Hence, the prints have to be generated at very high resolutions, to pass muster.
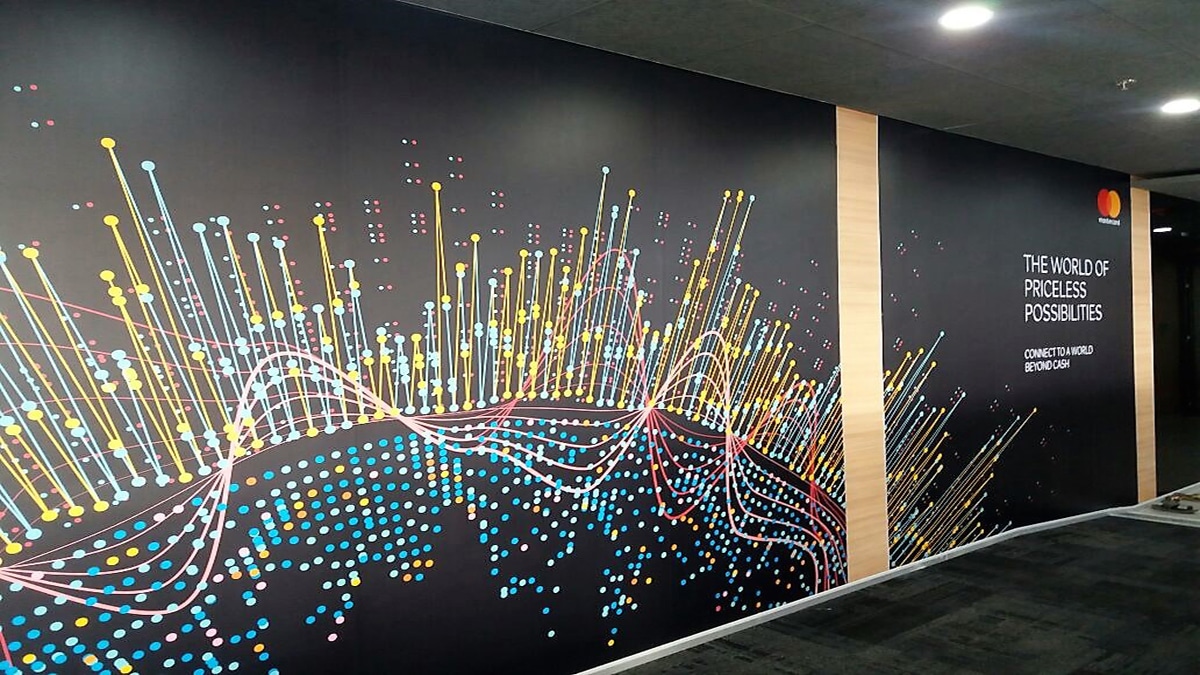
Here are the things that you need to consider, to get the walls in your office, branded…
The first step obviously, is to measure the height and width of your walls. Your content creator will need these dimensions for making the design/layout. We’ll talk more about designing, in a subsequent point.
The correct size will also help in estimating the cost of the project.
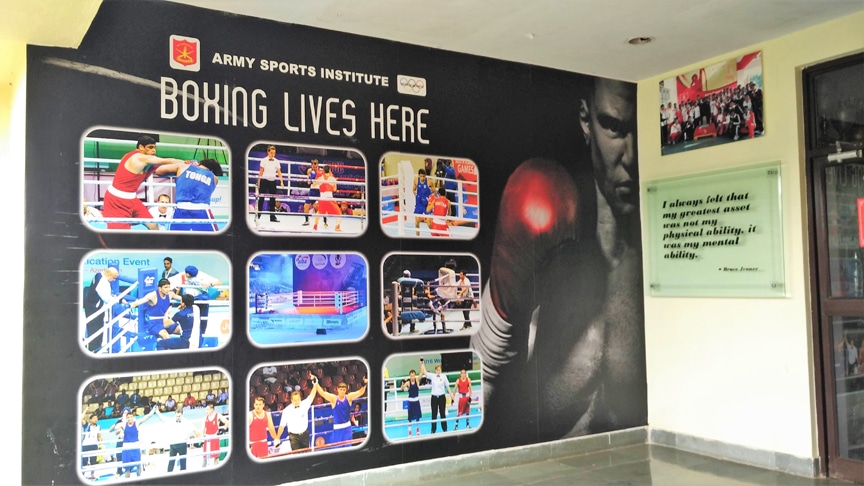
You need to make sure that the wall is smooth and painted, not rough, textured or unfinished.
Our wall prints are self-adhesive. A layer of adhesive (glue) on the back of the print is what makes it stick, so no extra glue or paste is needed. That adhesive holds well on a smooth painted surface, but it cannot grip a rough or textured wall evenly.

Personalised office decor is the central theme of this post. So a wallpaper job will only be as good as the content it displays.
Your wallpaper design can incorporate your company philosophy, images of your team, or even images of your products and services. Be sure to include your logo, company name, and tagline.
Walls in large corporate offices can easily be scores of feet long. So think larger than life imagery while creating your layout — as shown in the image below. After all, the more impactful your design, the more attention your print is going to get.
And if you need access to professional designers or ad agencies to help you with your layout, just jump to this page here.
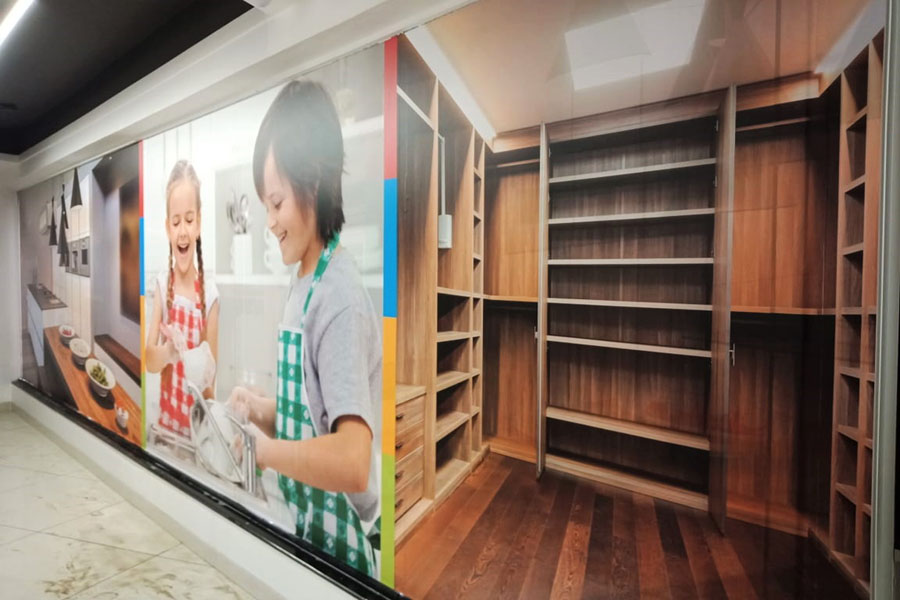
Once your art file/design is ready, you need a print bureau with wide-format printing machines, like ours.
We break your design into manageable tiles 3, 4 or 5 feet wide. These tiles will then be printed out on a specialised wall vinyl.
Vinyl is a media, that printers use, to reproduce images at an extremely high resolution. Moreover, printable vinyl typically has an adhesive back, enabling the print to be pasted on a variety of surfaces.
As I mentioned earlier, our job will be generated on a specialised wall-vinyl material which can be printed upon, and directly pasted on walls.
We also add a protective layer of lamination. A laminated wall print will easily withstand dust, scratches, water damage and other daily wear and tear. Our smooth wallpaper comes laminated as standard, in matte or gloss.
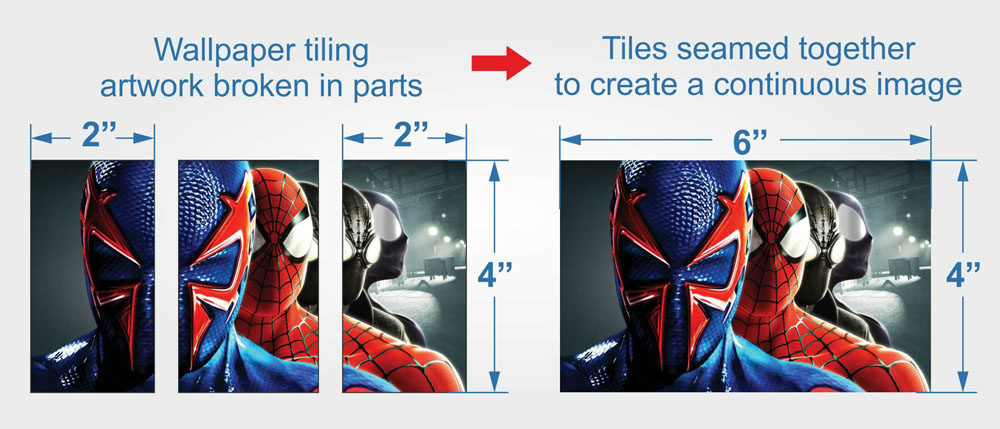
Custom wallpaper prints are delivered as tiles 3, 4 or 5 feet wide.
So the next step is to paste these individual tiles on the wall and combine them into a cohesive whole. In Pune, our own fitting team can come to your site and finish this job.
Alternatively, you can choose to do the pasting yourself.
You have to install it just like any large sticker. Clean the wall, peel off the backing and evenly paste the print on the surface. Use a squeegee to smooth out the wrinkles and bubbles caused while pasting. Here is a helpful video about wallpaper pasting, that you might want to check out. And if you are still planning your wall, our 5-minute guide to office wall prints (below) walks you through it.
Personalising your office walls is a great office interior design idea. But achieving the same will need a little more effort than swiping your card, at a generic wallpaper shop.
Implement the above steps. And trust me.
The end result will be worth it.
Our custom wall prints cost ₹70 per sq ft + 18% GST, delivered to you in a roll.
The price includes…
01
The wall media (our standard wallpaper vinyl; 3M or Avery on request, at a higher price)
02
The actual print
03
And a top coat of protective lamination
So, as an illustration, if you need to cover a wall of size 10 feet X 8 feet, it should cost you:
10 feet X 8 feet X ₹70 = ₹5,600 + 18% GST
The smallest print is 8 x 4 ft and our minimum order is ₹3,000 + GST.
Want us to install it? In Pune, our installed rate is ₹100 per sq ft + 18% GST, which includes installation on orders of ₹10,000 + GST and above; smaller installed jobs are quoted after we review them. Outside Pune, we deliver the roll free on orders of ₹3,000 + GST, and you or your team paste it.
Want To Learn More About This Office Decor Idea?
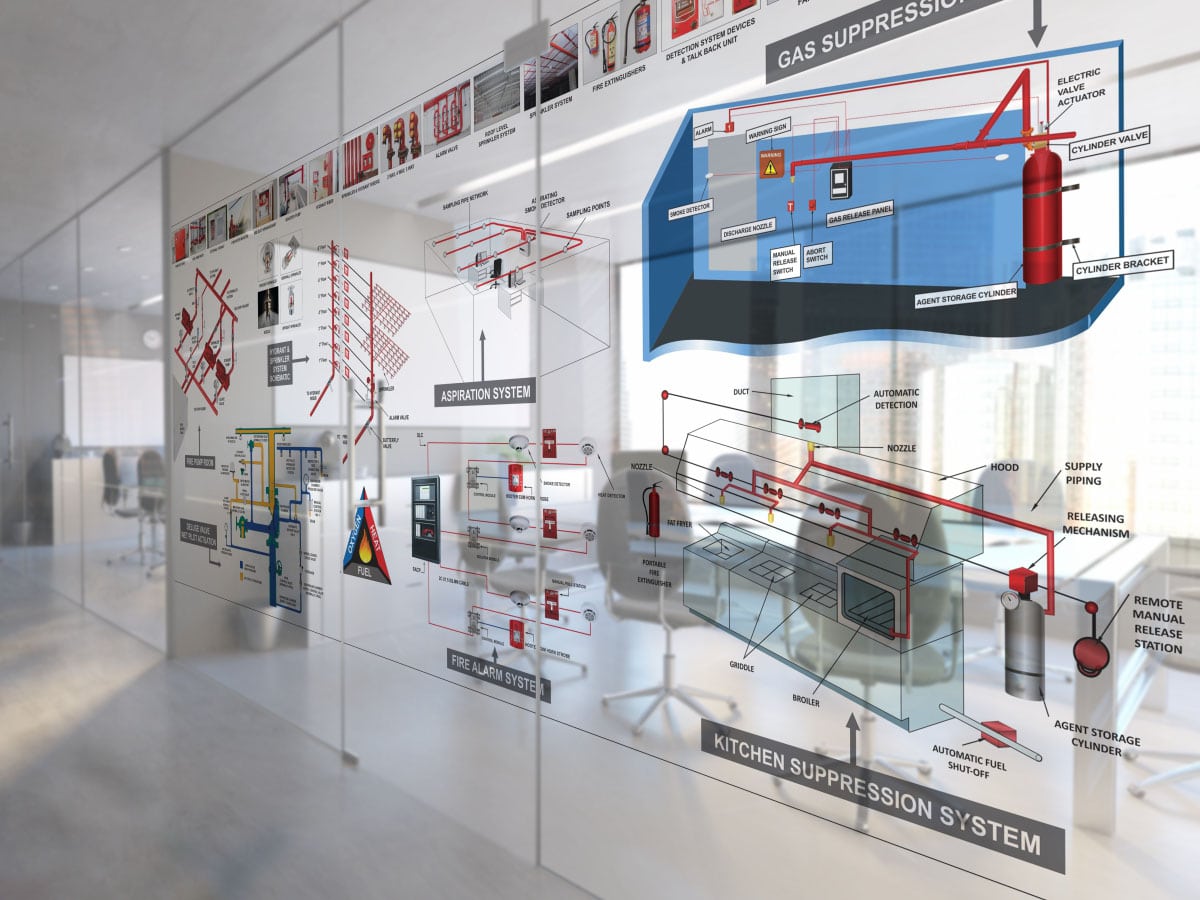
Modern supermarket storefronts are made up almost entirely of glass. Corporate offices too contain glass panels and partitions. And just like walls, these bare glass panels also offer a huge scope for branding and office interior decor.
A smart architect can use these glass panels to showcase a company’s mission and vision statements, the philosophy that drives an organisation, custom imagery, motivational quotes, and even product pictures.
When branding and advertising on glass panels, interior decorators get to control an additional dimension of the print.
That of transparency and opacity.
A variety of glass printing media allow you to set the transparency level on the panel. And we will be discussing this transparency factor in more detail further on.
But for now, let us see how prints on glass actually take place.
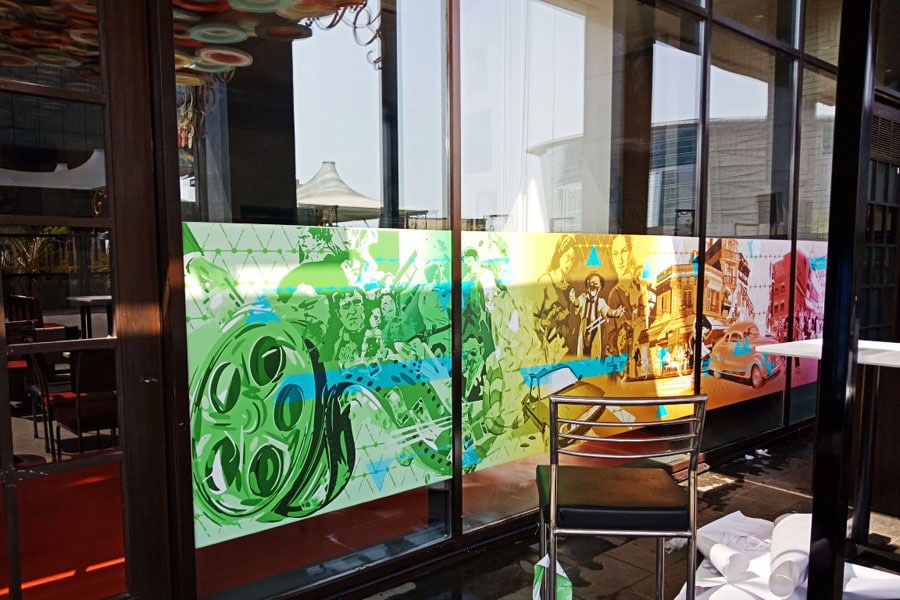
To brand the glass surfaces in your organisation, you can opt for either of the following methods:
01
Print directly onto your glass panels
02
Print your job on specialised glass films with an adhesive back. These films are then pasted onto your glass partitions
Some print shops reproduce images directly onto glass panels using a technique known as ‘Flatbed UV Printing’. The sheet of glass is placed in the UV printer, and the flatbed machine then uses specialised UV inks (that adhere to glassy surfaces) to print images directly on top of it.
We don’t print directly on glass. We print on glass films instead, and here is why.
Films have one more advantage: they can be peeled off. That matters if you lease your premises, or if you want to change the design later, because direct UV prints on glass are more or less permanent.
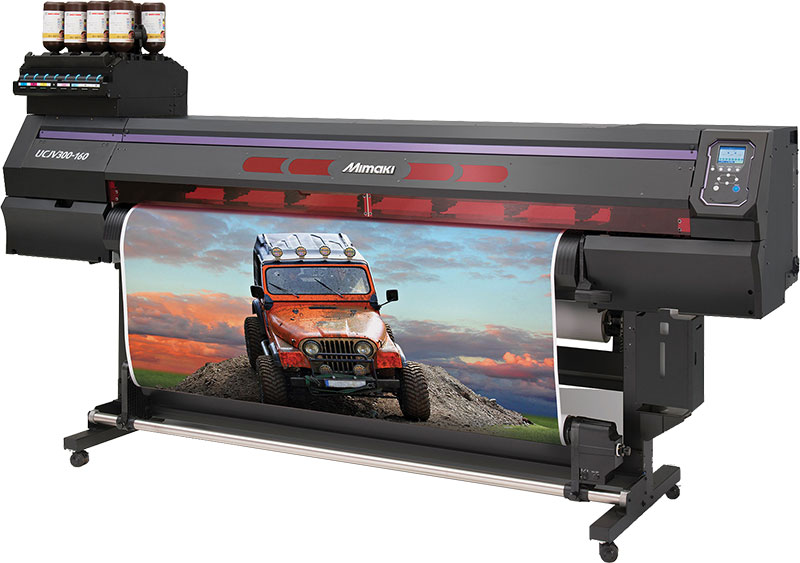
This is where we come in. We print your designs on specialised glass films on our wide-format printers. These printed films are then carried to your site and pasted on the glass panels in your office.
Custom printed glass film prints offer two great advantages:
01
Rollback and changeability
02
Control over privacy by selecting a transparency level
Glass film prints have an adhesive back. So you can peel off the same, at a later date, to restore your glass surface to its original state.
You can also opt to change the prints/content periodically.
Since a new film costs far less than new glass, malls, stores, restaurants, etc. continually update their glass surfaces to showcase current offers and new product launches.
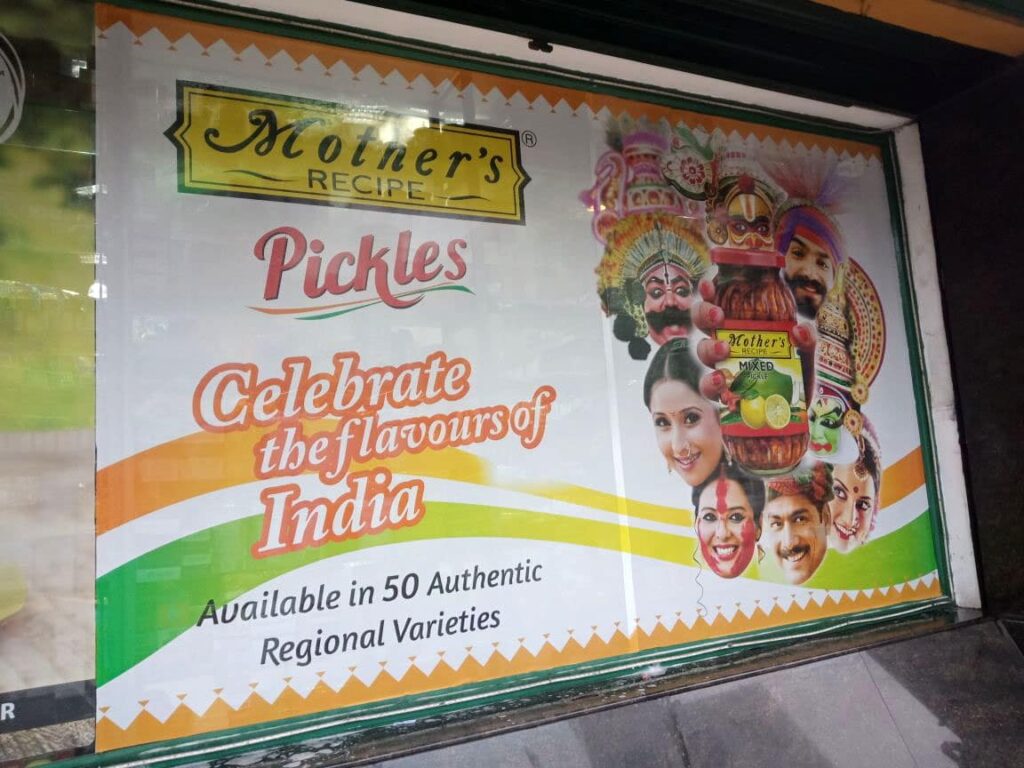
By default, the glass panels in your office (or the front facade of your storefront) will almost certainly be transparent. And this works great for natural lighting purposes.
But certain sections of your office (the boss’s cabin for example), may need some degree of privacy.
So we offer glass film prints with varying degrees of transparency to meet different use case scenarios. Listed below are the main types of glass film prints we make. This short video explains them too.
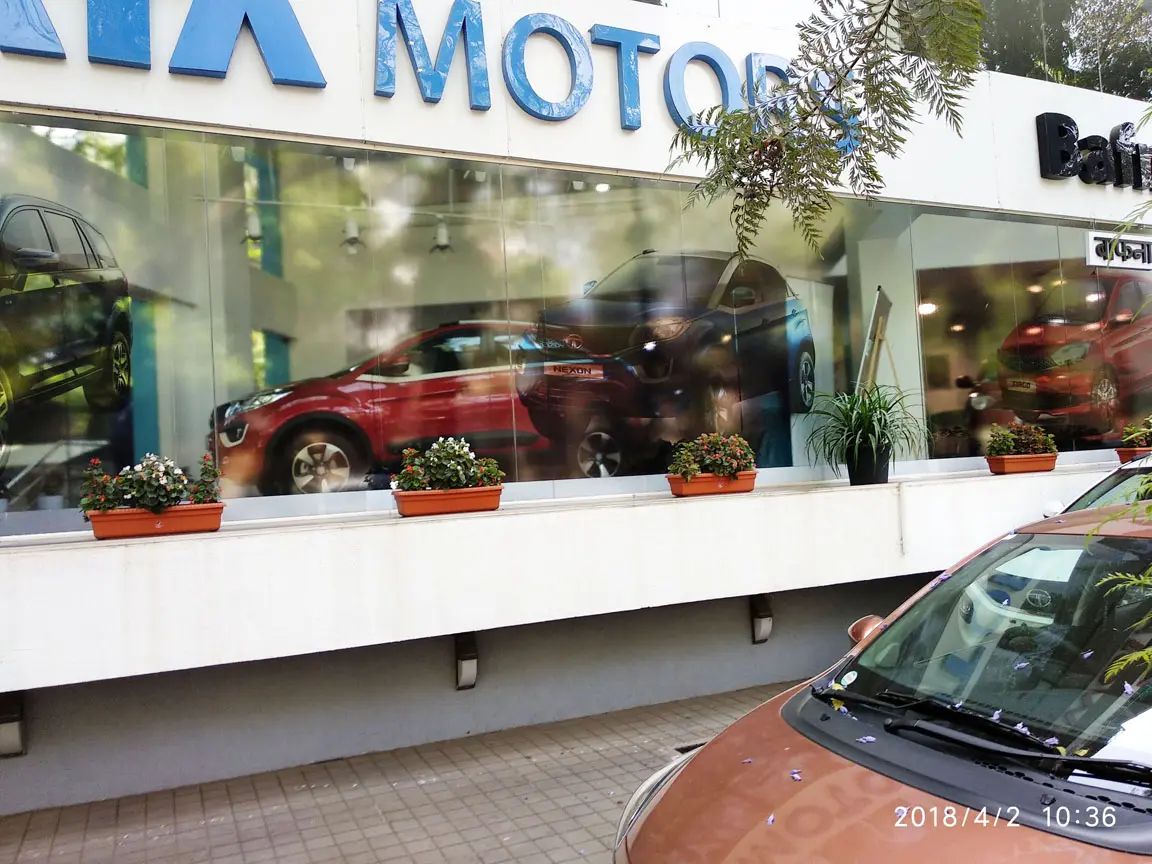
As the name suggests, transparent glass film prints are completely transparent. While they depict an image on the glass surface, they also allow light and vision, to pass through.
So if the glass frontage of your office building is branded with transparent glass films, people passing by will be able to see the inside of the office, in addition to the images on the print.
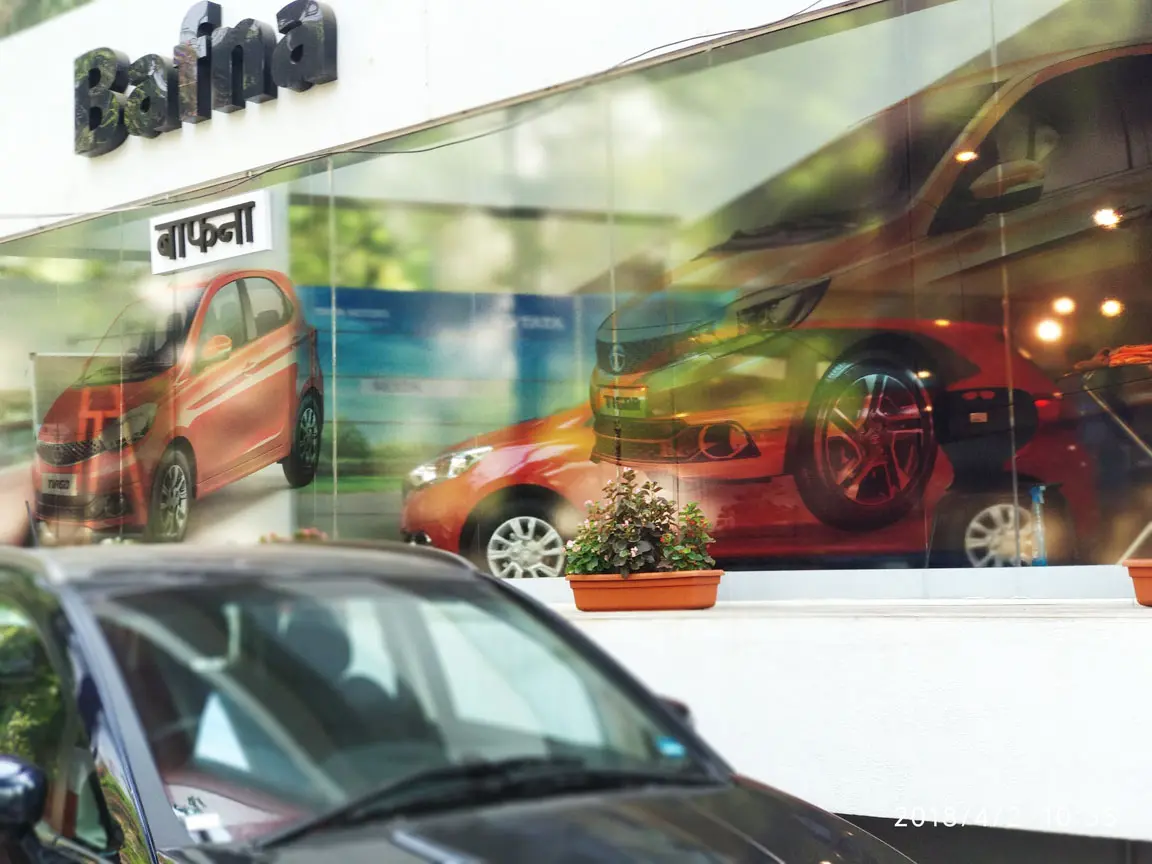
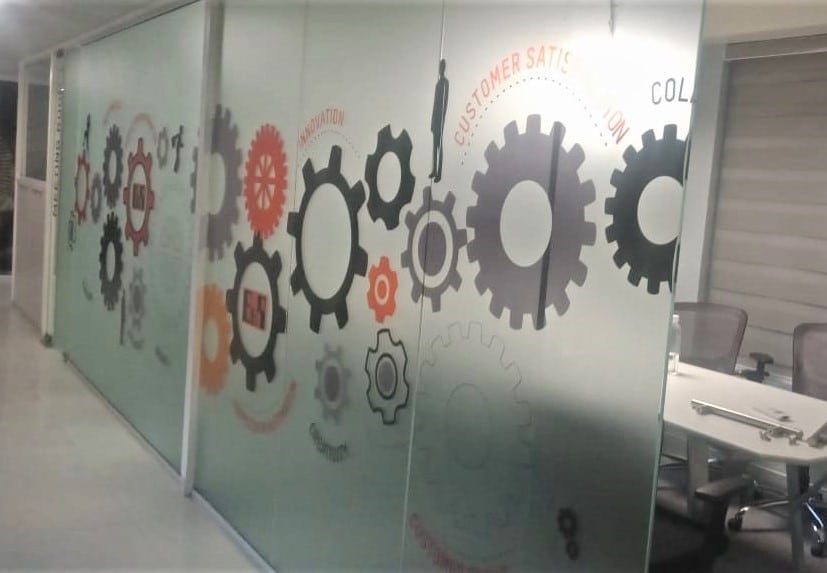
Frosted glass film prints give the panel beneath a milky, etched-glass look. These films are translucent in nature.
This means that the film will allow natural light to pass through. But at the same time, since they are not transparent, a casual passerby cannot glance inside the office or see the people inside.
On the other hand, because of the frosted effect, people inside the office cannot see the happenings on the other side of the glass panels either.
Frosted glass film prints allow for beautiful office interior branding. Moreover, these prints do not cut natural light. And, on top of all this, they protect the privacy of the occupants inside the office.
The one disadvantage of frost film prints is that people on the inside, cannot see what is happening outside either. And that is something, the next option will enable…
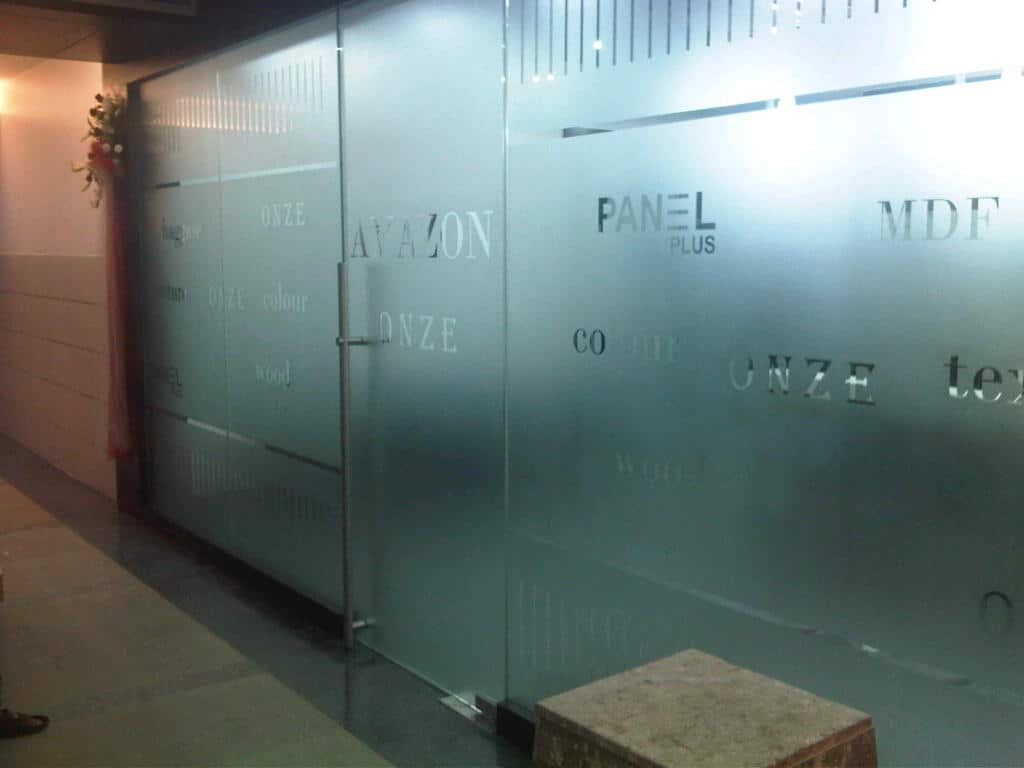
Here is Where You Can Order Frosted Glass Film Prints for Your Office

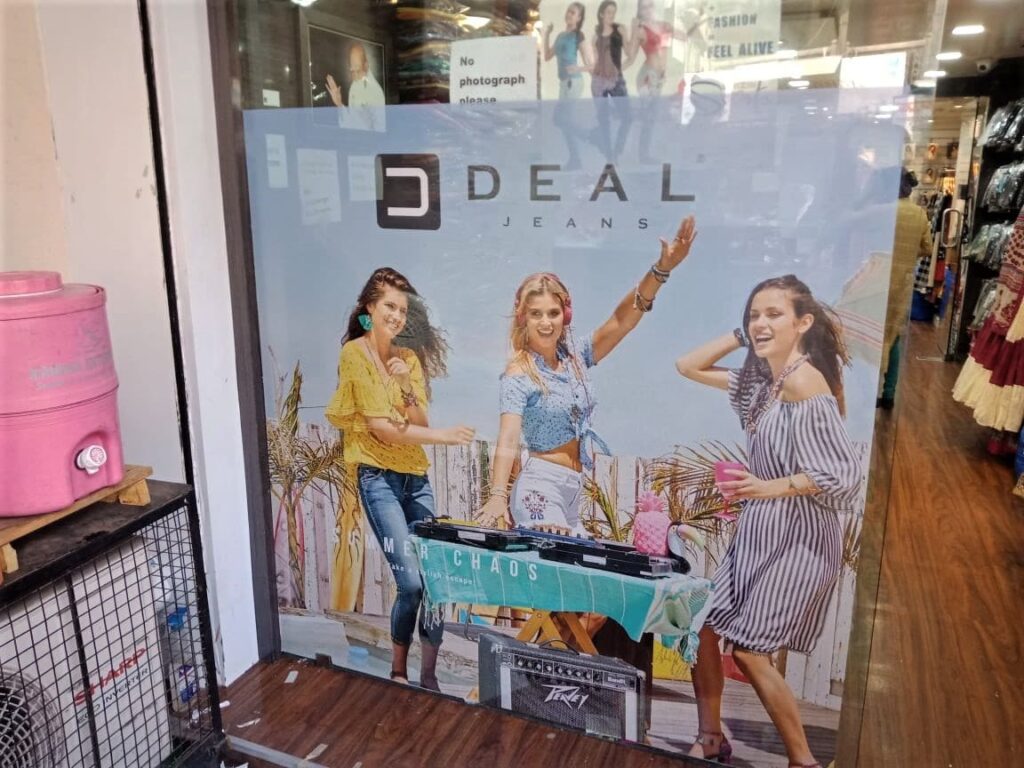
One way vision film prints are a pretty clever solution for advertising on glass panels. You probably have noticed them on supermarket facades or on the glass fronts of fast-food eateries.
One way vision prints allow you to place your product imagery on the glass panels of your storefront, for the benefit of people walking by.
But while people on the outside are looking at these images, the people inside the office/shop can see what is happening on the outside.
In a very true sense, one-way vision films allow vision to pass through from transparent glass in one direction, and restrict it, in the other.
Intrigued by the Idea of One-way Vision Films. Click to Know More.
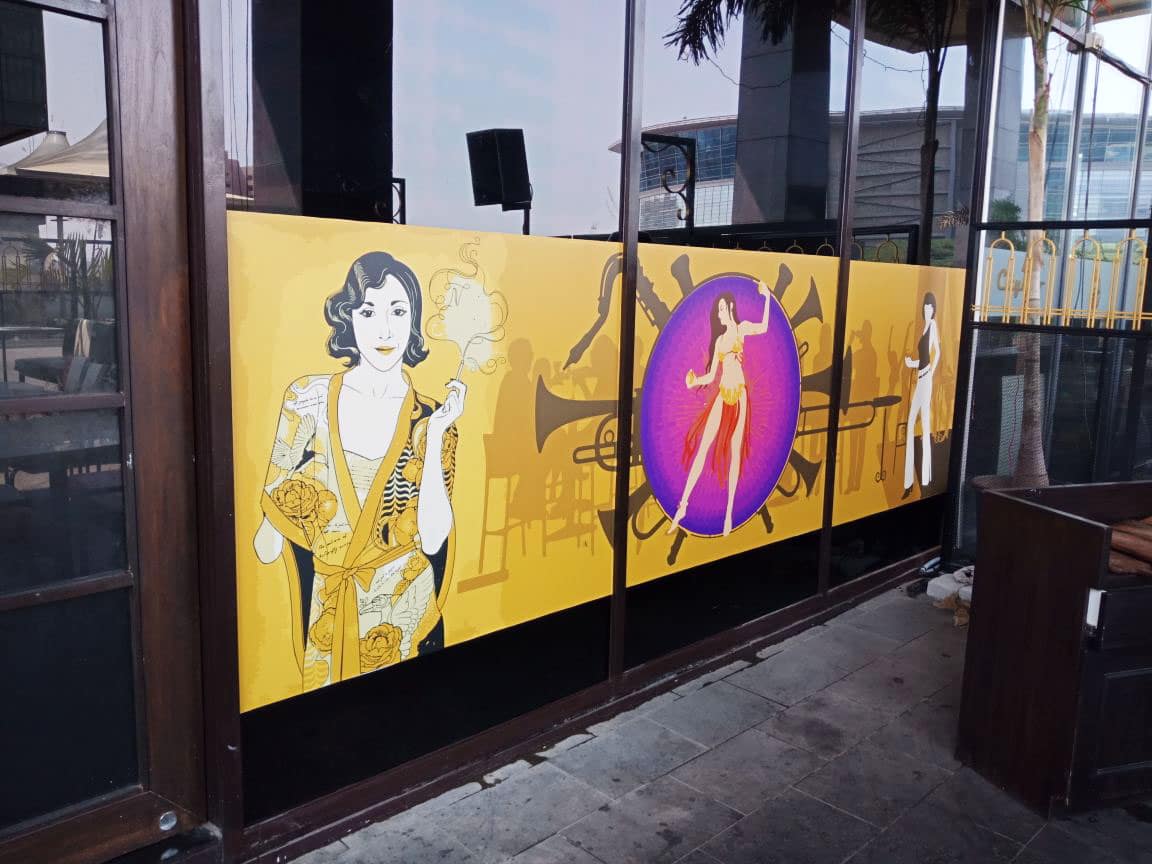
As the name suggests, opaque glass film prints restrict light and vision from both sides of the glass panel. Here we print the job on regular white vinyl prints and paste the same on the glass panel.
Frost film prints will allow you to make out vague humanoid shapes moving behind the glass panel. But an opaque print will totally occlude visibility and protect the privacy of the people inside the office.
Opaque vinyl prints also look very vibrant and colourful.
While all the types of films listed above are pretty intuitive, there is one type of glass film print that even many professional architects and interior designers are unaware of.
Namely, White Ink Prints for Glass.
White inks allow for the creation of glass film prints that are transparent in certain portions and opaque in others. This opens up the possibility of beautiful looking glass prints for your office interiors.
This is made possible by using opaque white. White inks do not allow light to pass through as against the standard CMYK inks in any printer, that are transparent.
While I have included white ink prints in this list, to make it more complete, their exact working is explained in more detail, in this post here.
For now, let me state that white inks allow for partially opaque and partially transparent film printing. They also enable the printing of reverse pastable glass films and films with different images on either side.
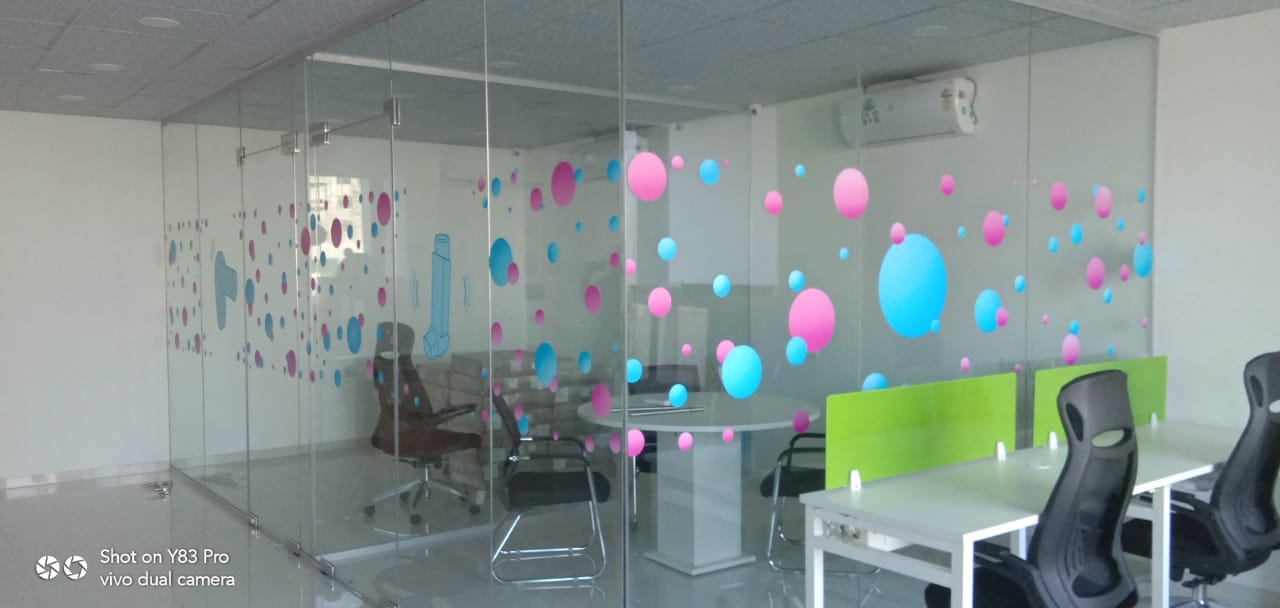
Much like commissioning a wall print job, glass branding involves…
01
Measuring the glass panel that needs to be covered
02
Selecting the right film based on your needs for transparency/privacy
03
Sending your design/layout to a print bureau for the actual printing
04
Onsite installation
Since all of the above points are covered in detail in this section here, I will move on to the subject of pricing.
Different glass films have different rates. One-way vision and opaque films cost ₹70 per sq ft, transparent and frosted films ₹90 per sq ft, and white-ink films start at ₹120 per sq ft (all + 18% GST).
The price includes…
01
The glass film (our standard films are Wyte™, GCO™, SGM™, LSM™ or Onyx™; 3M™ or Avery™ on request, at a higher price)
02
The actual print
So, as an illustration, if you need to cover a panel of size 4 feet wide X 8 feet tall with opaque film, it should cost you:
4 feet X 8 feet X ₹70 = ₹2,240 + 18% GST
Our minimum order is ₹3,000 + GST and the smallest film print is 3 x 4 ft, so a single panel like this is usually ordered together with a second panel or other prints (two such panels cost ₹4,480 + GST).
Installation: in Pune, we install glass films on orders of ₹10,000 + GST and above, quoted separately; smaller jobs can be installed in Pune for a small extra charge. Outside Pune, we deliver the films free on orders of ₹3,000 + GST, and you can paste them yourself. This video shows how.
Apart from its name, every business organisation is also identified by its logo. In fact, in modern business today, a logo can become the identifying factor of an organisation.
Think of any famous company like Apple, Nike, Mercedes, etc., and its logo will instantly jump to your mind.
So an additional mandate for any architect / interior decorator would be to tastefully display an organisation’s name and logo. And obviously, this logo has to be put up at a location where it can be seen by everyone, employees and visitors alike.
Now, shop glow-sign boards take care of your company identity on the exteriors of your building. But here is a solution to impressively brand the reception/lobby of corporate offices.
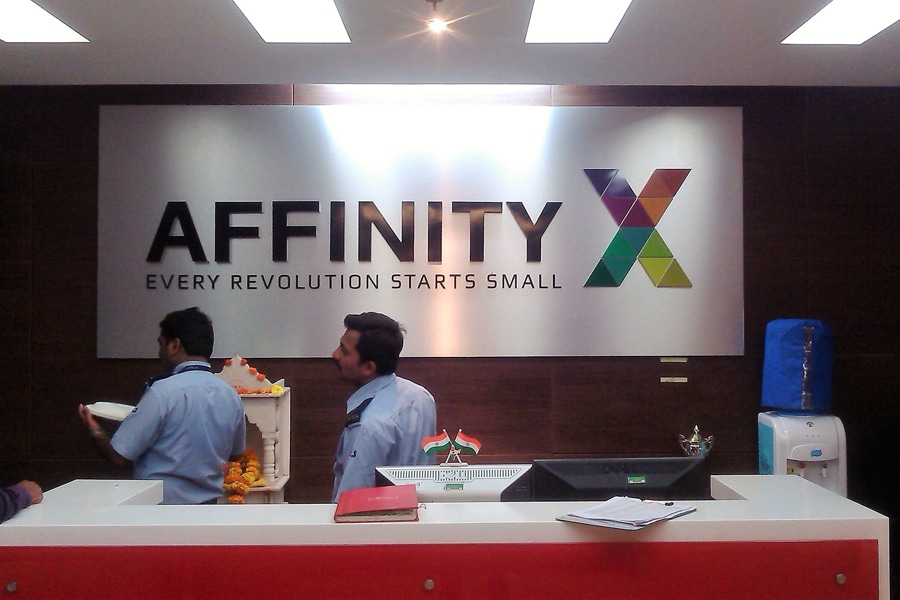
Namely, Laser Cut Acrylic Logo/Name Boards.
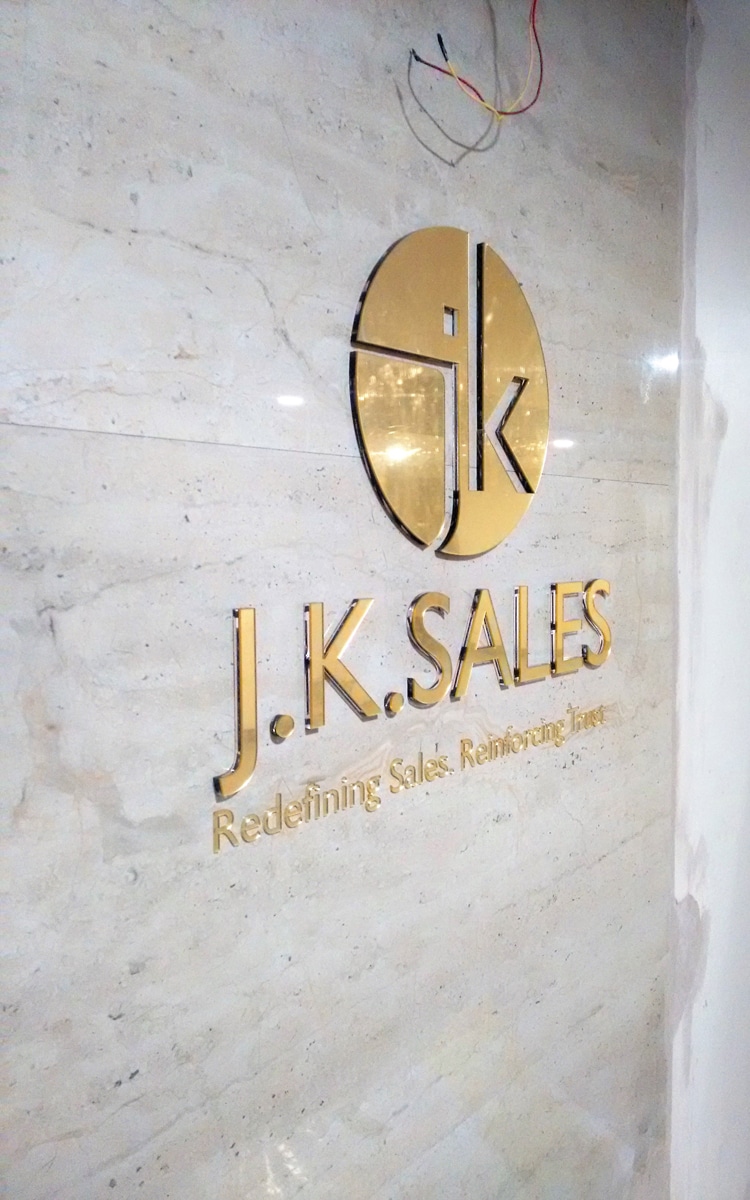
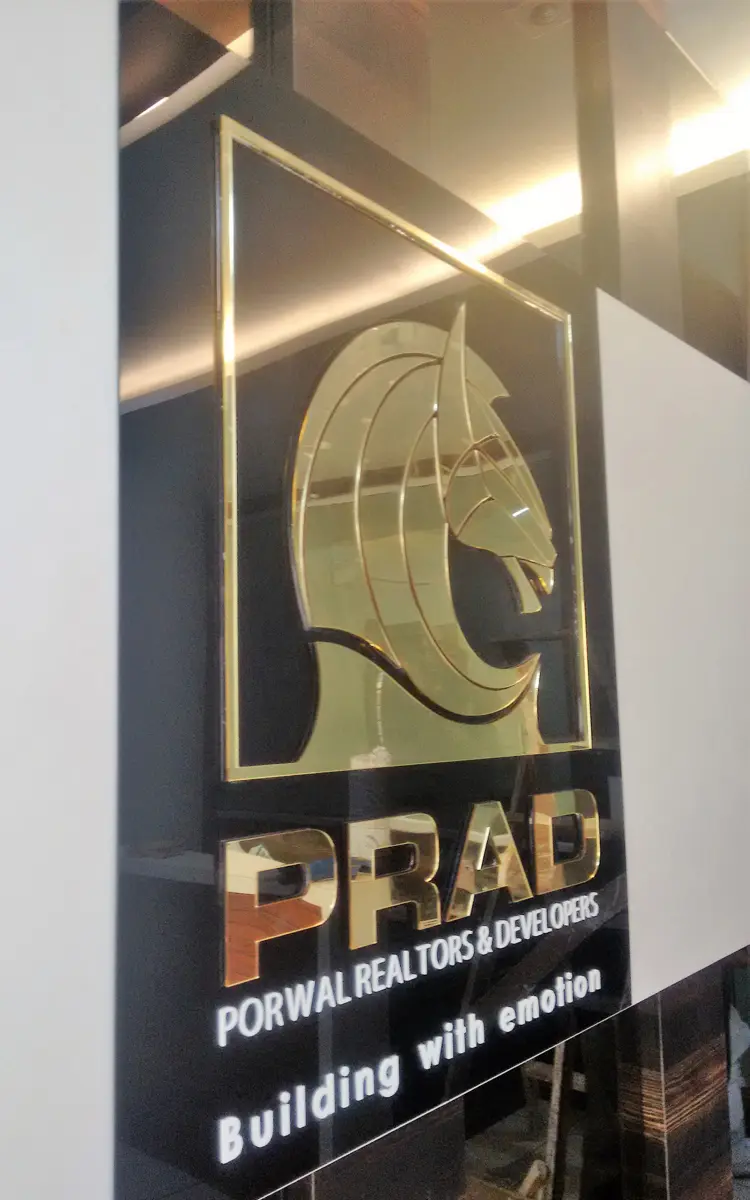
We fabricate classy, 3D logos out of a material called acrylic.
Acrylic is a shiny glass-like sheet that is available in a variety of colours. You might also know acrylic by its oft-used brand name – Perspex
Acrylic sheets are available in varying colours and different thicknesses like 3, 5 and 10 mm. But, and perhaps most importantly, acrylic can be cut in just about any shape, using laser cutting machines.
So all you have to do is email us your logo design. We then choose an acrylic sheet matching your logo colour and place it in our laser cutting machine. The machine precisely cuts out your logo shape from the large sheet and voilà…
One classy looking 3D Acrylic Logo/Name Board, ready.
Acrylic name boards can be fabricated in two variants:
As described in the process above, logo boards are fabricated from acrylic sheets, cut on laser engraving machines. These individual letters/parts of the logo are mounted on a thick base plate which is then installed on the wall, in your office.
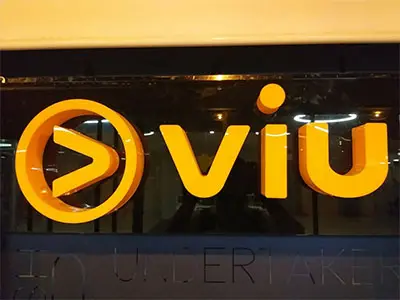
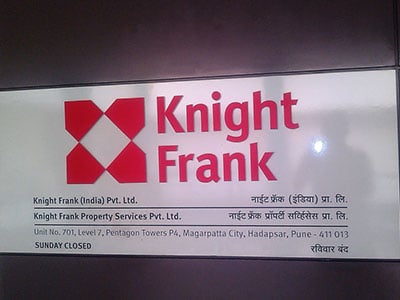
Letters can also be affixed directly on the wall without an intervening base plate as shown in the images below.
Either way, these signs look striking and draw attention. You can commission your own 3D logo/name board on this page.


Ready to Source an Impressive 3D Acrylic Logo Board for Your Reception? Click Here! Lit Acrylic Letter Boards
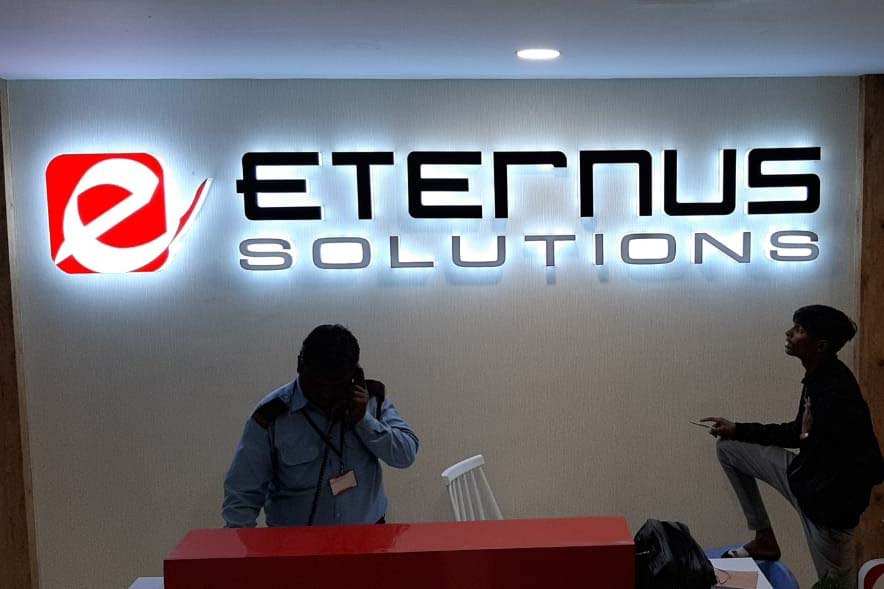
In addition to being glasslike in its finish, acrylic also allows light to pass through. So by extending your budget a little, you can also opt for a beautifully glowing backlit sign for your office entrance.
We embed small LED modules under the laser-cut acrylic letters, connected to a compact power supply. And all you got to do, to get your lit signboard going, is add electricity.
There are scores of forms, a lit glow sign board can take. These include 3D acrylic LED letters, metallic back-glow letters and aluminium profile letters. For offices, our backlit acrylic logo letters come in two variants: fitted directly on the wall or mounted on a base plate.
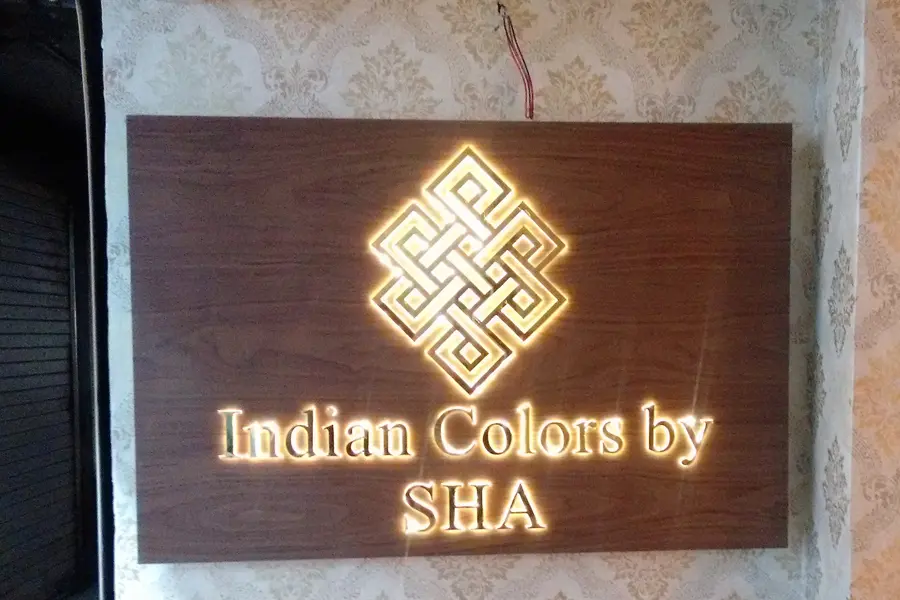
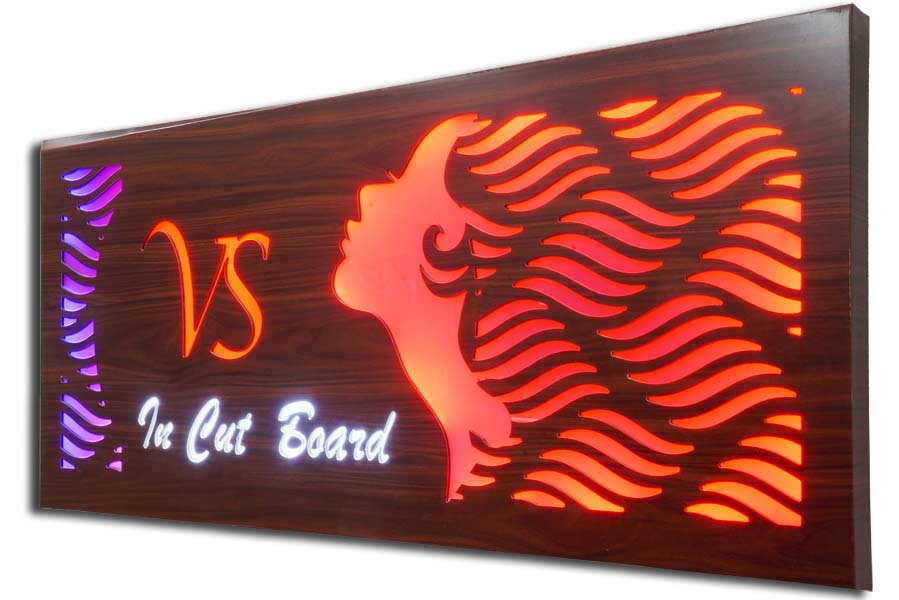
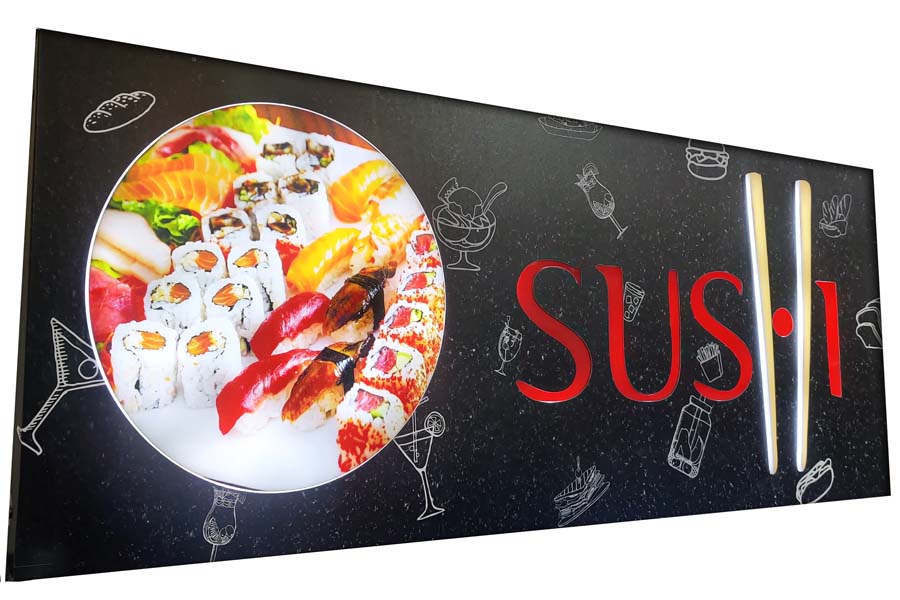
Getting a logo board made for your office is a fairly straightforward process. Just follow the steps below…
You need to give us the size that you need your logo to be fabricated in. While the dimensions need not be exact, a ballpark measurement is needed, to enable us to arrive at an estimated cost for the job.
So give a moment’s consideration to where the logo needs to be installed. How large does it need to be? And at what placement will the logo board make a maximum impact on your visitors and office decor.
The next step is for you to share the logo design file with us. Remember, the design is going to be laser-cut in acrylic.
So do make sure that you mail your logo file in a vector file format (like CorelDraw or Adobe Illustrator), to us.
At Orchid Digitals, before undertaking the acrylic board job, we always send a soft copy proposal to the client. This clearly illustrates the board specifications, dimensions, materials, cost, etc.
Apart from this, we also clearly mention which components of the sign are 3D, which are 2D, which elements are lit and which ones will remain non-lit.
We have always found that a customer armed with this kind of information is in a better position to take a call with respect to the job.
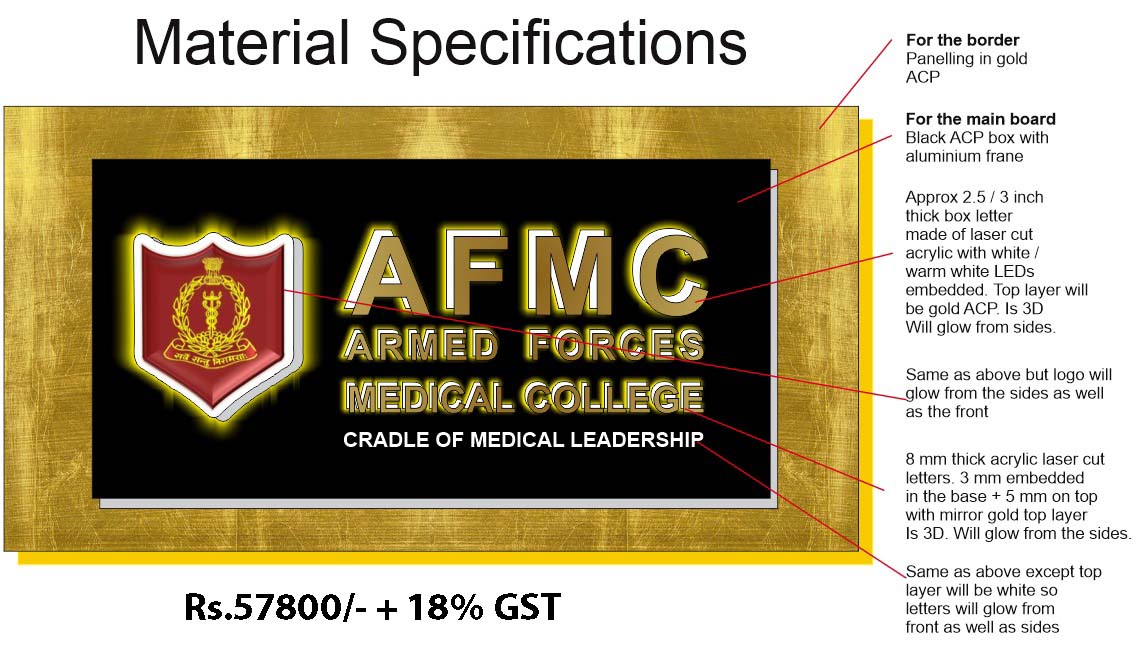
A non-lit acrylic logo board costs ₹800 per sq ft + 18% GST. This means that if your board size is 3 feet wide X 2 feet high, it will cost…
3 feet X 2 feet X ₹800 = ₹4,800 + 18% GST
A lit (backlit) logo board costs about ₹2,000 per sq ft + 18% GST. The exact price depends on the construction, the materials and the number of LEDs, so we send you a proposal with the full cost before we start.
Our minimum order is ₹3,000 + GST. Installation in Pune is quoted separately (on orders of ₹10,000 + GST and above; smaller jobs for a small extra charge). Outside Pune, logo boards are shipped with the shipping cost charged extra, and we tell you the cost before dispatch.
Need a 3D Acrylic Logo Board With a Back Glow?
Every business needs to communicate a variety of messages to its customers. These could be a listing of their services, prices, product pictures or even corporate mission statements.
These messages, in the form of large-sized posters, can be used to adorn the walls of your office. And this is where you need the services of a professional print provider to generate high-resolution reproductions of your digitally designed posters.
Now, since this post is about office decor ideas, tacking on loose colour printed sheets on your workplace walls is an absolute no-no. What you need is a classy and refined way to communicate your messages.
And that is what I want to talk about – Professional Poster Solutions for your office walls.
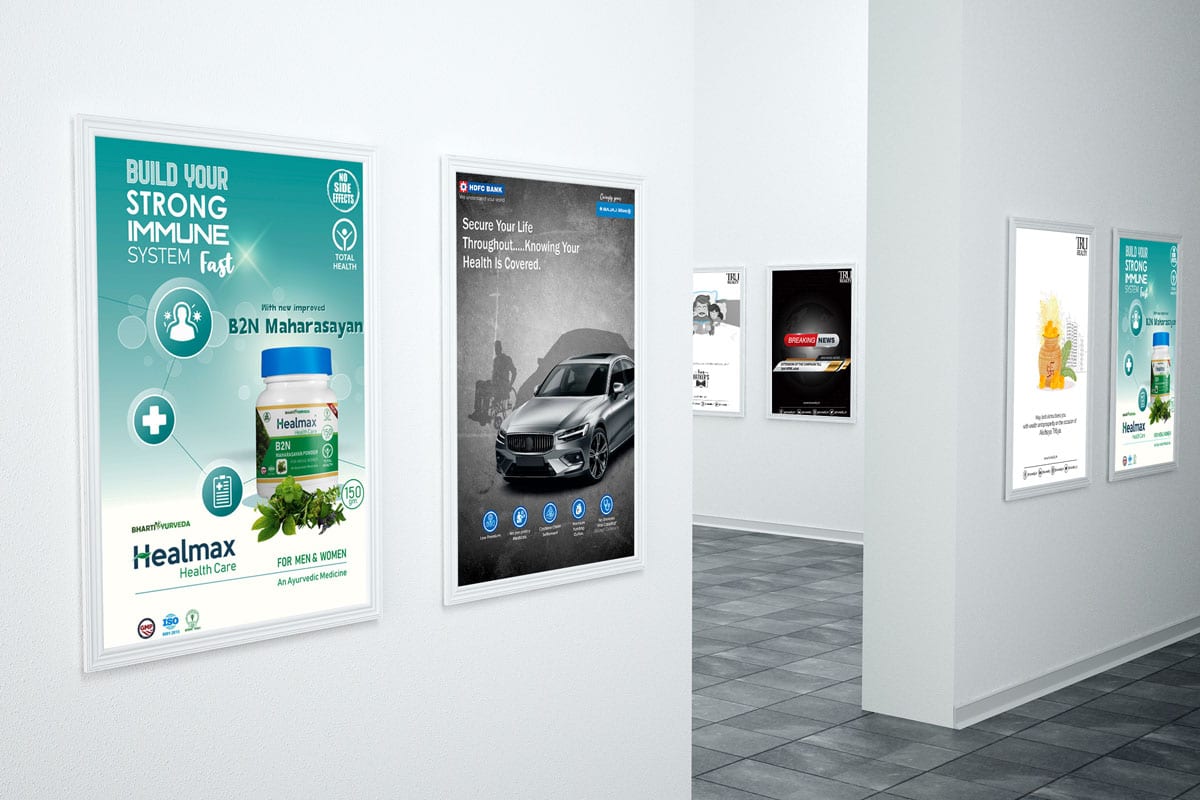
We offer a variety of media for your poster jobs, from simple sunboard posters to glowing LED frames.
And while posters can be made of a variety of materials and frames, here are four types of posters I’d recommend, for a work environment.
01
Sunboard Prints
02
Acrylic Sandwich Frames
03
LED Slimline Frames
04
Gallery-framed Canvas Prints
Sunboard, also referred to as foam sheet, is a thick rigid sheet of PVC. It is smooth, flat and extremely light-weight. And more importantly, extremely high-resolution digital prints can be reproduced on sunboard sheets.
We print your communication on these rigid PVC sheets to create highly professional-looking posters. And since this foam sheet material is pretty light in weight, you can simply nail the print to your walls or even use double-sided tape to tack them on.
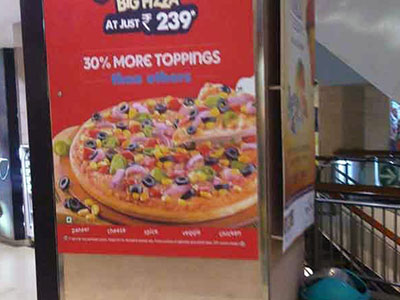
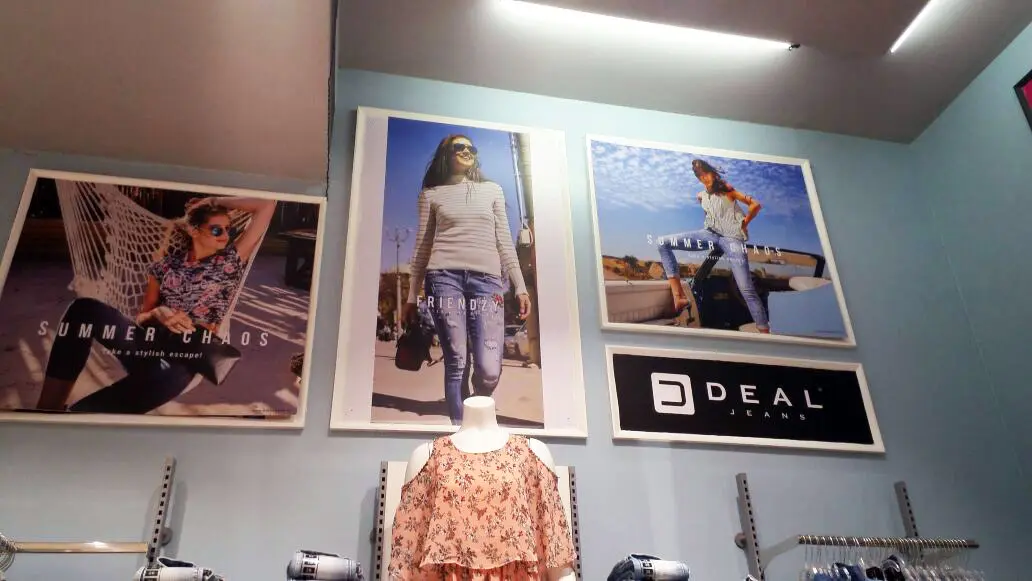
Moreover, sunboard prints are quick to make and easy to replace. This makes them ideal for short-term campaigns. This is also why, almost all the wall posters you see in shops, retail stores and malls, are printed on sunboard.
So the next time you enter the trial room of a clothes store, you will know how the image of that larger than life model, pasted on the wall, was made.
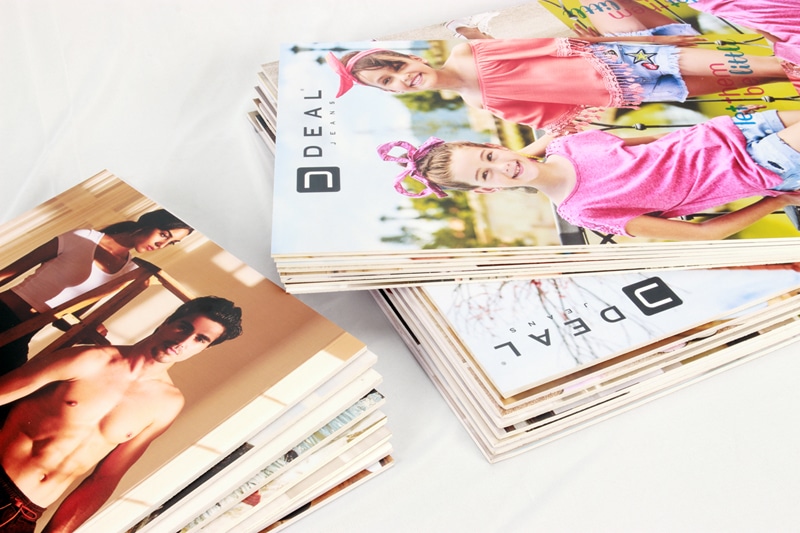
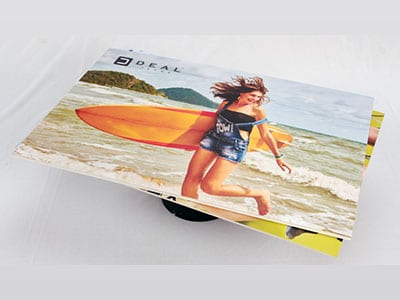
Acrylic, as I mentioned in the previous section, is a clear glass-like material. But acrylic also has two major advantages over glass…
And these properties make acrylic an ideal material for fabricating display frames for large-sized posters.
One form of poster display, often deployed in corporate offices, is an Acrylic Sandwich Panel.
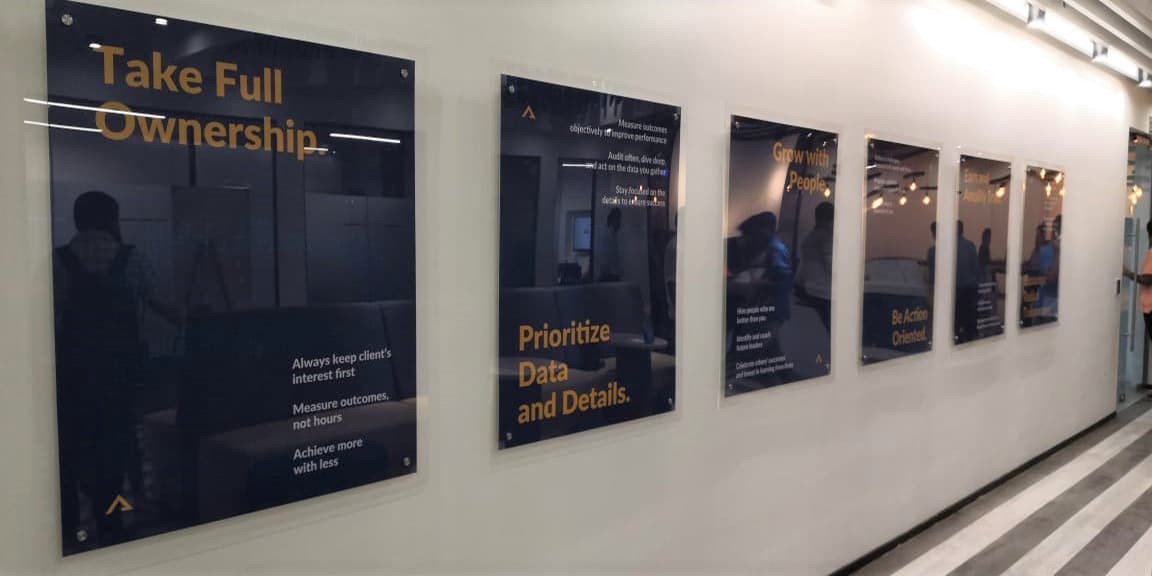
As the name suggests, we take two sheets of clear acrylic, and press (or sandwich) a high-resolution photo print between them.
This assembly is then installed on the wall using stud-caps and risers. A ‘riser’ basically holds the frame a couple of inches away from the wall. The round, disk-like stud-cap on the front, masks the screw holding the frame in place.
Now, while the above fabrication is simple enough, the end effect is pretty stunning.
What visitors to your office see, is a shiny sheet of glass, floating a slight distance from the wall, holding your poster print. And so, while sunboard prints do look nice, a shiny acrylic sandwich panel will look significantly more classy.
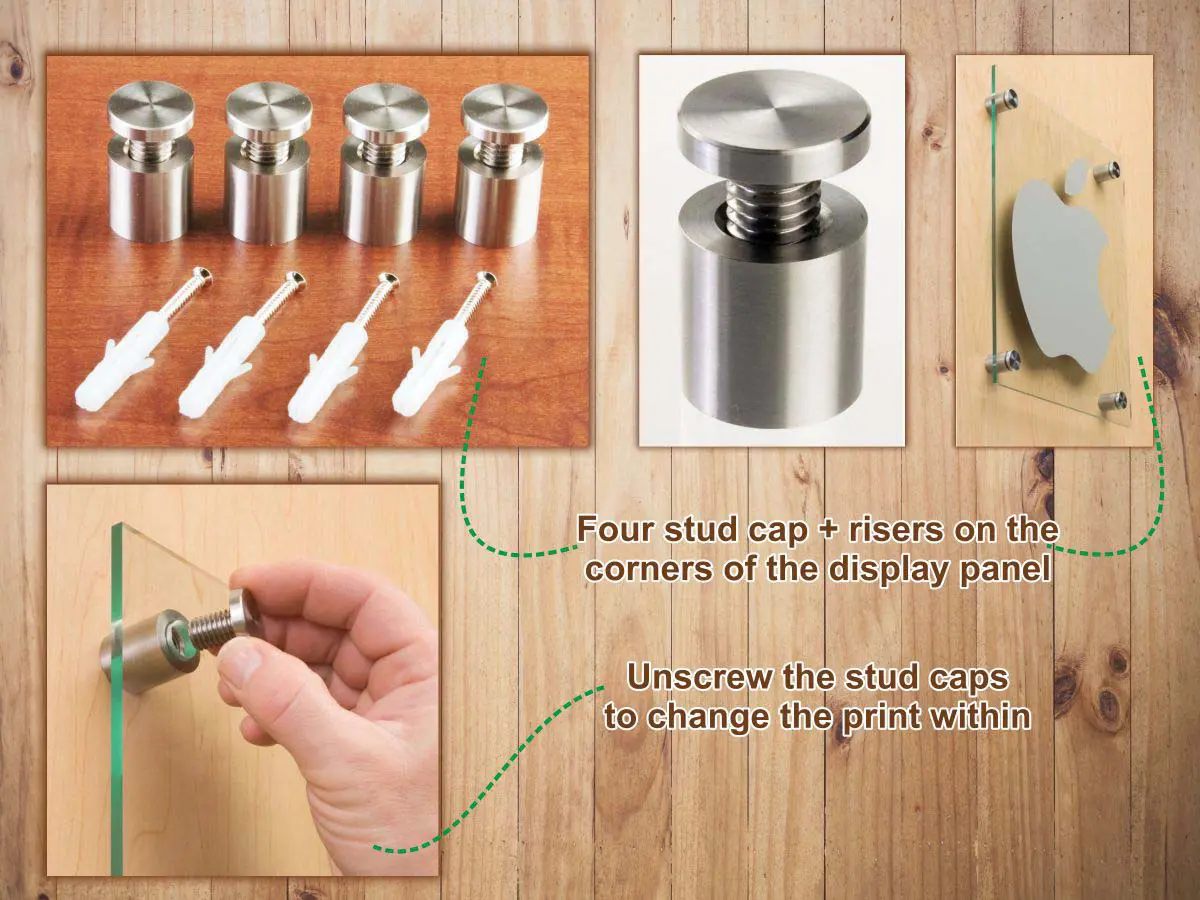
An added advantage of sandwich frames is that you can detach the sheet in front and easily replace the print within.
This also means that while you need to pay for the entire assembly the first time, you can repeatedly replace the print inside for just the cost of a new print (₹70 per sq ft + 18% GST).
Prefer a single glossy sheet instead? Our reverse-printed acrylic poster panels bond your print behind one clear acrylic sheet, for the deep, glossy look of back-painted glass. The print is sealed in permanently, so choose the sandwich panel if you want to change posters.
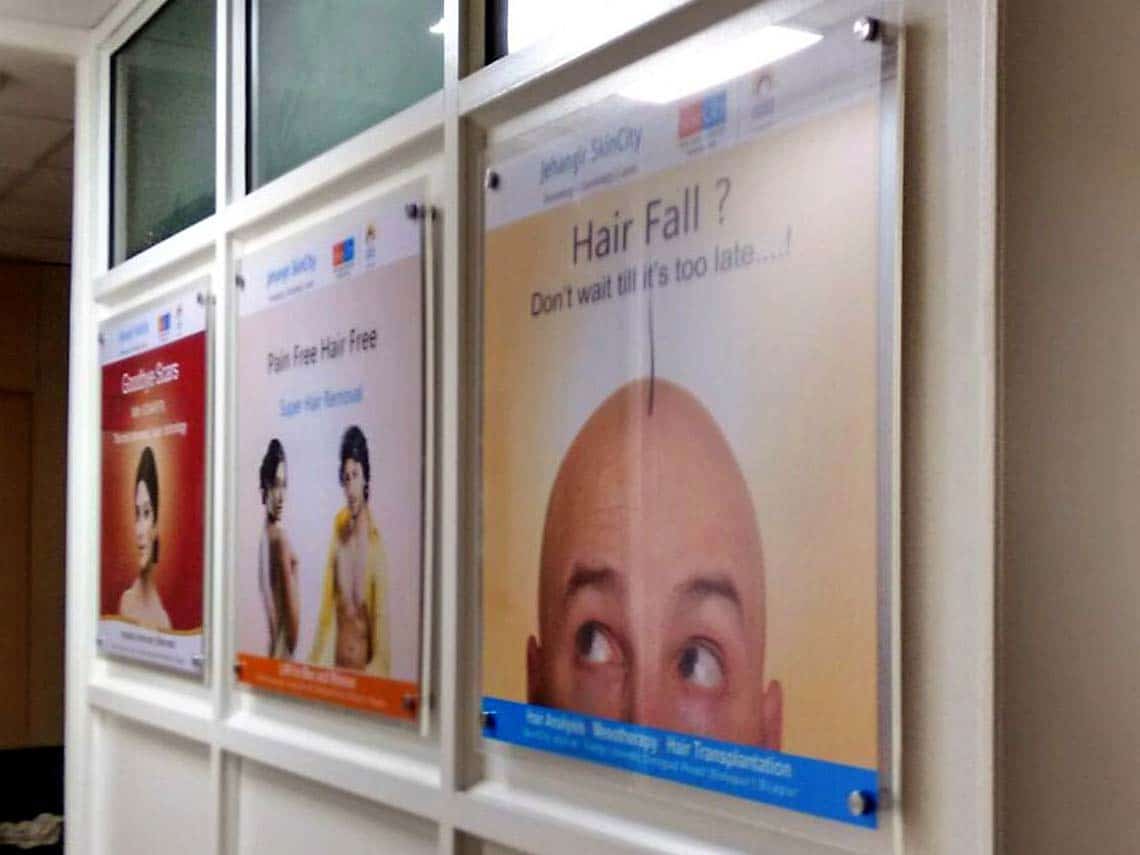

Want your poster to light up? An LED slimline frame is an ultra-slim light box, less than 1 cm thick, with a glass-like acrylic front and hundreds of LEDs spread evenly behind it.
Switched off, it looks like a plain glass panel holding your picture. Switched on, the whole image glows brightly and evenly, so it catches the eye by day and at night.
(LED slimline frames replace the aluminium and LED clip-on frames we used to make, which are no longer offered.)

Your image is printed in high resolution on a thin translucent sheet. The sheet slides into the frame, sits behind the acrylic front and lights up from behind.
To change the picture, simply slide the old print out and a new one in. You buy the frame once, and after that you only pay for new prints.
The frame hangs on hooks at the back, so you can put it up on the wall yourself.


LED slimline frames are for indoor use and are made to your size, from small photo frames to large display panels. Frames and replacement prints are priced on request, and our minimum order is ₹3,000 + GST.
In Pune, delivery is free on orders of ₹3,000 + GST. The frames are fragile, so outside Pune they are shipped with the shipping cost charged extra, and we tell you the cost before dispatch.
Prints on photo paper do look good. But when these same images are reproduced at a high resolution on natural cotton canvas, they look absolutely stunning.
And so while canvas material does not intuitively come to mind when you are thinking about wall posters, I have included the same in our list of poster options because canvas prints are a great idea to enhance our office (and home) interiors.
Custom canvas prints are perfect for reproducing fine art and paintings. You can also blow up your product images on a large-sized canvas frame. Hi-resolution food photos printed on this material, are a common sight in upscale restaurants.

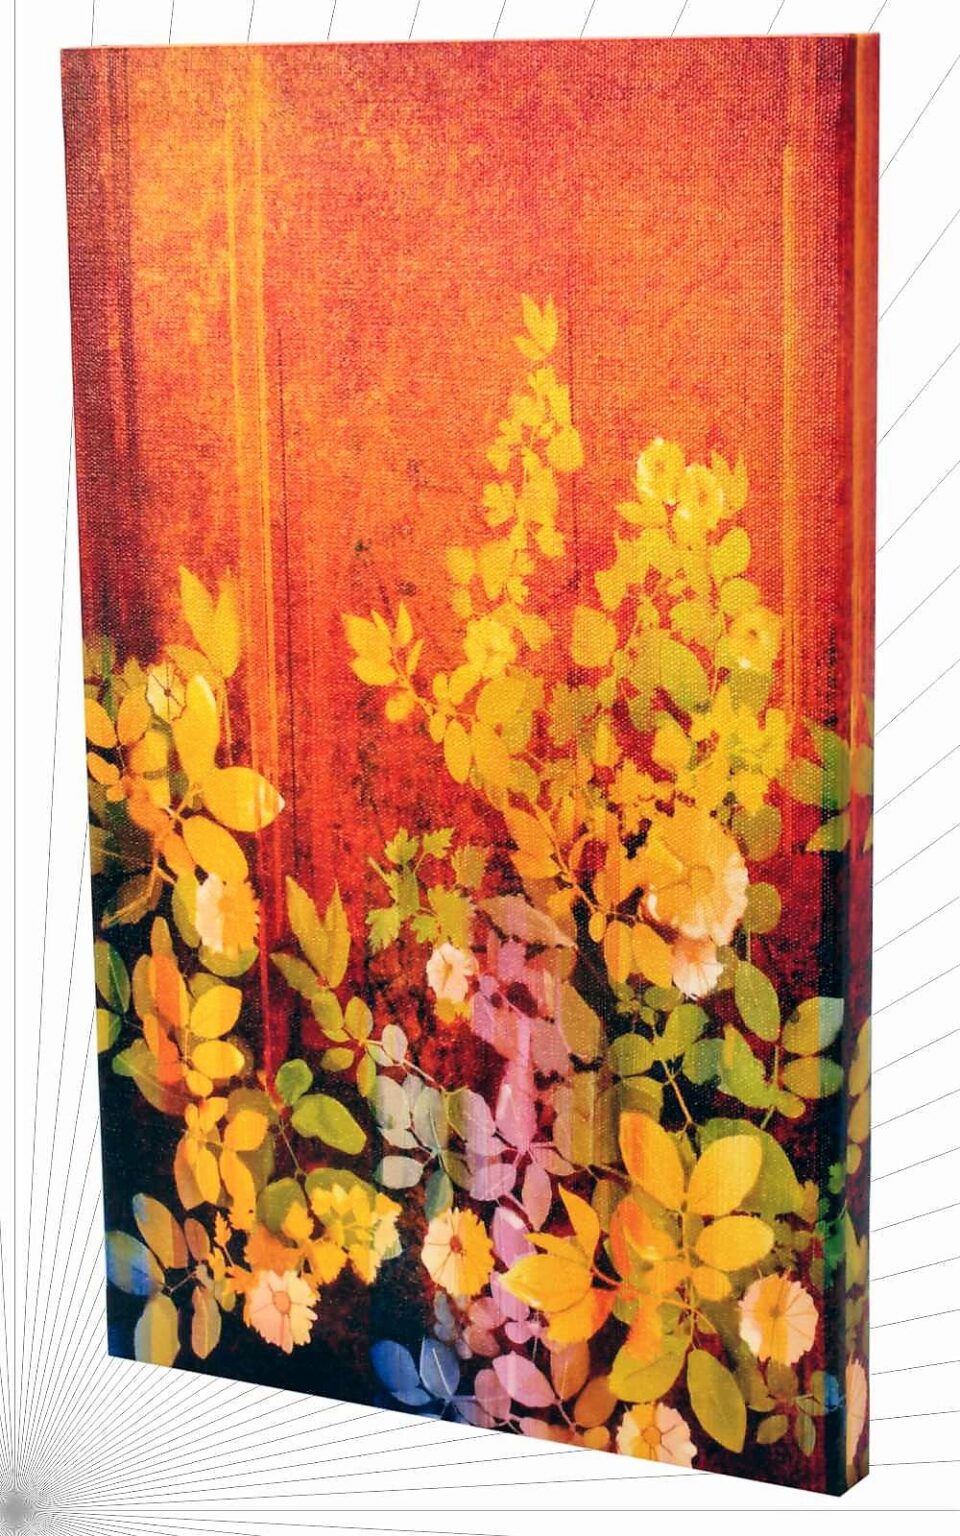
Natural cotton canvas allows for very high-resolution image reproduction with eye-poppingly vibrant colours. Its rich, cloth-like texture provides a visually appealing alternative to the other, plasticky, poster media solutions available in the market.
And finally, since this post is about enhancing office interiors, I’d also like to talk about the vast variety of framing options available for your canvas print. Any good frame-shop will offer wood, metal and fibre frames for your print.
But I personally like one particular framing option – the Gallery Frame
Gallery framing involves wrapping the outer edges of the canvas media around the edges of the wooden frame. The actual frame is fully concealed by the print. And when viewed from the sides, you don’t see the frame but just the image overflowing over the edges.
This edge wrapping adds a visually appealing end effect to our print and makes it look very pretty.
Need to Print Canvas Prints for Your Office Interiors? Jump to This Page Now.
The very idea of commissioning a custom poster job is so that you can reproduce prints of your designs/artwork. This also means that you can order your posters in any size you desire.
We can make a small A3 sized poster as easily as a 10 feet large, wall covering print (should the latter take your fancy).
But as a convention, many posters follow the proportions of the ISO A-series, a ratio of about 1:1.4. An A2 poster, for example, is about 16.5 inches wide and 23.4 inches high. This ratio is pleasing to the eye.
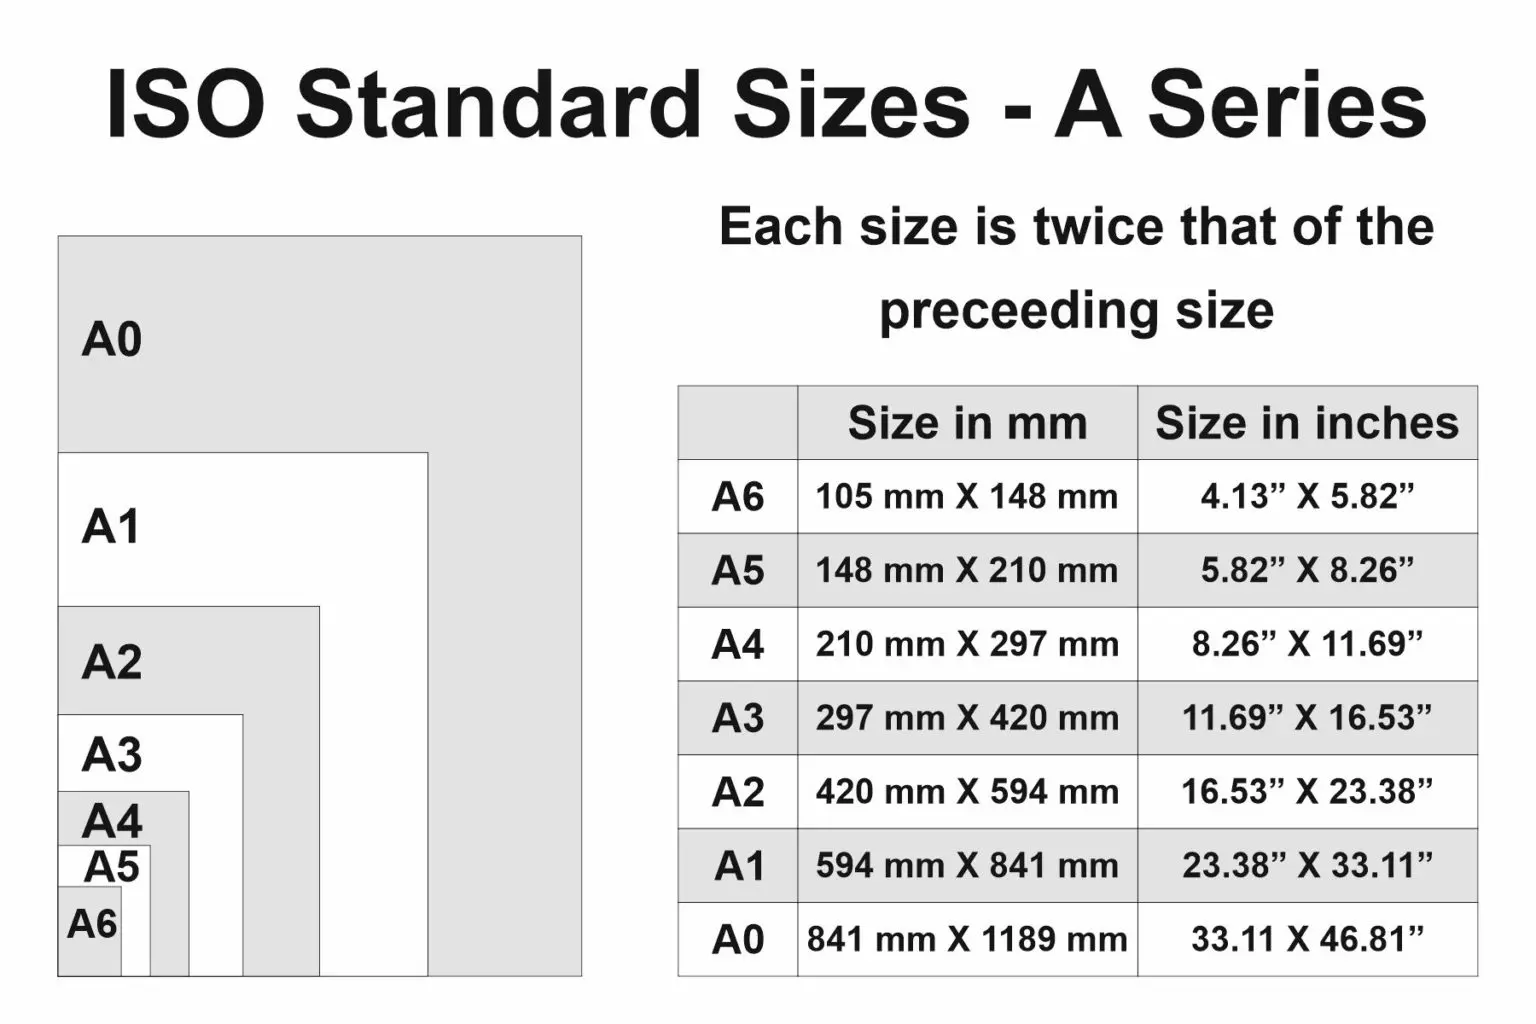

In fact, there is an international measurement standard called the ISO A-series that follows this ratio. The ISO A-series recommends poster print sizes like A2, A1, A0, etc. And in addition to looking good, these sizes also minimise material wastage in the press.
Keeping the above ratio in mind, here is a chart showing the prices of different poster types at different sizes. But do remember that while this table acts as a quick reference for your budgeting purposes, you can commission posters in just about any size you want.
| Poster Type | A2 size | approx. 18 x 24 inches | 1.5 x 2 feet | A1 size | approx. 24 x 36 inches | 2 x 3 feet | A0 size | approx. 36 x 48 inches | 3 x 4 feet |
|---|---|---|---|
| 5 mm Sunboard Poster (laminated) | ₹390 | ₹780 | ₹1,560 |
| Acrylic Sandwich Panel | ₹1,200 | ₹2,400 | ₹4,800 |
| Reverse-printed Acrylic Panel (3 mm) | ₹2,400* | ₹2,400* | ₹4,800 |
| Gallery-framed Canvas | – | – | ₹4,800 |
Please note:
When interior decorators think about areas for branding, they generally visualise the walls, glass partitions or even the ceilings inside the office/store. But there is one area that is often overlooked when it comes to office design interiors.
In fact, most people are not even aware that this area can be used for advertising. I’m talking about advertising on the very ground we walk on.
And this is where Floor Stickers come in.
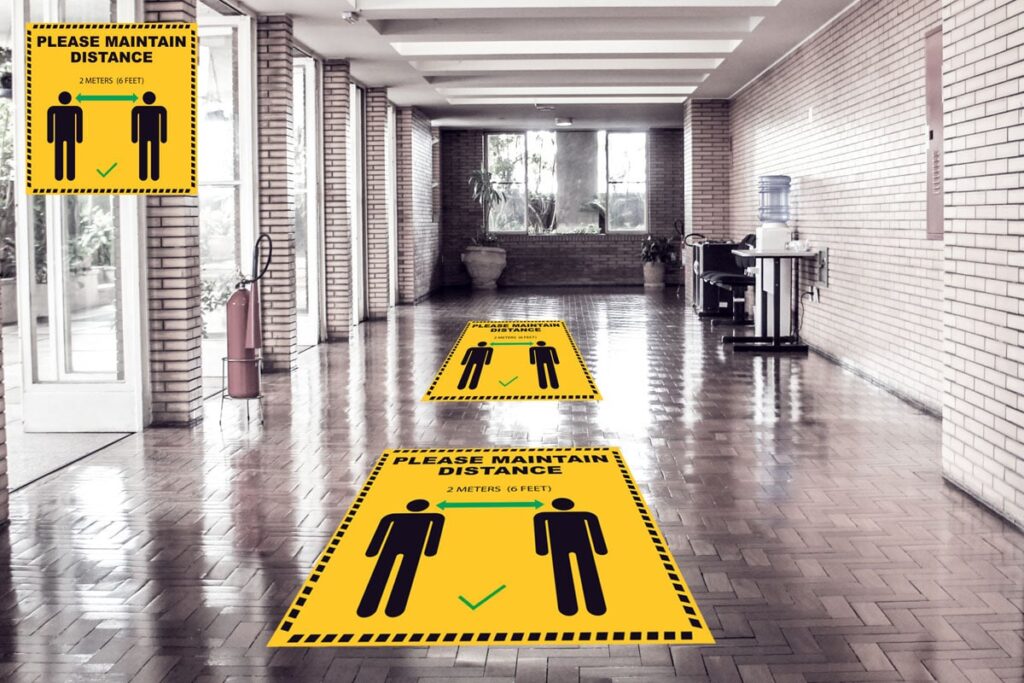
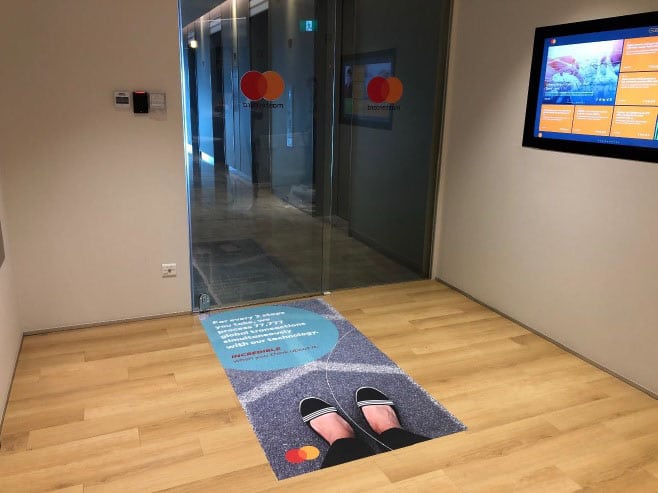
Advertising on floors may sound counter-intuitive. But if done right, floor stickers can really attract and hold customer attention.
Imagine ambling down a uniformly tiled space. All of a sudden, you perceive, at the lower edge of your vision, a change in colour. Your feet may sense a change in the floor texture as well.
And curiosity is bound to make you glance at the area where these perceptual changes are coming from. So when you see a large and colourful floor graphic at your feet, you can’t help but pause and take notice of the same.
I also feel that people are subconsciously exhausted with visuals on overcrowded walls. And tend not to pay too much attention to them. Hence, floor stickers, in addition to being a great office decor idea, can also be deployed as alternative attention-grabbing visuals.
A floor sticker does not lead an easy life.
Apart from daily wear and tear, the print has to withstand spiked heels, hobnailed shoes, vacuuming, and wet mopping. The footfall in some malls can number in the hundreds, if not thousands of visitors. And each of these bipeds will be mercilessly treading on our print 🙂
So, to perform its intended application, floor graphic prints need to be pretty robust.
There are mainly two components that go into the making of a good floor sticker.
We use specialised media for floor graphics. This vinyl print has an extremely strong adhesive and will not peel easily from the ground.
For long-term floor graphics we use Wyte™ floor vinyl with air-release channels, printed with high-resolution eco-solvent or UV inks.
While the above floor print is extremely strong, we add another layer of topcoat on the same, for added protection.
This topcoat is also known as floor over-laminate.
Floor over-laminates are a very thick layer of plastic, pasted on top of the print. Ours is 200 microns thick, with a textured anti-skid surface. This top-coat significantly adds to the functionality of our floor sticker.
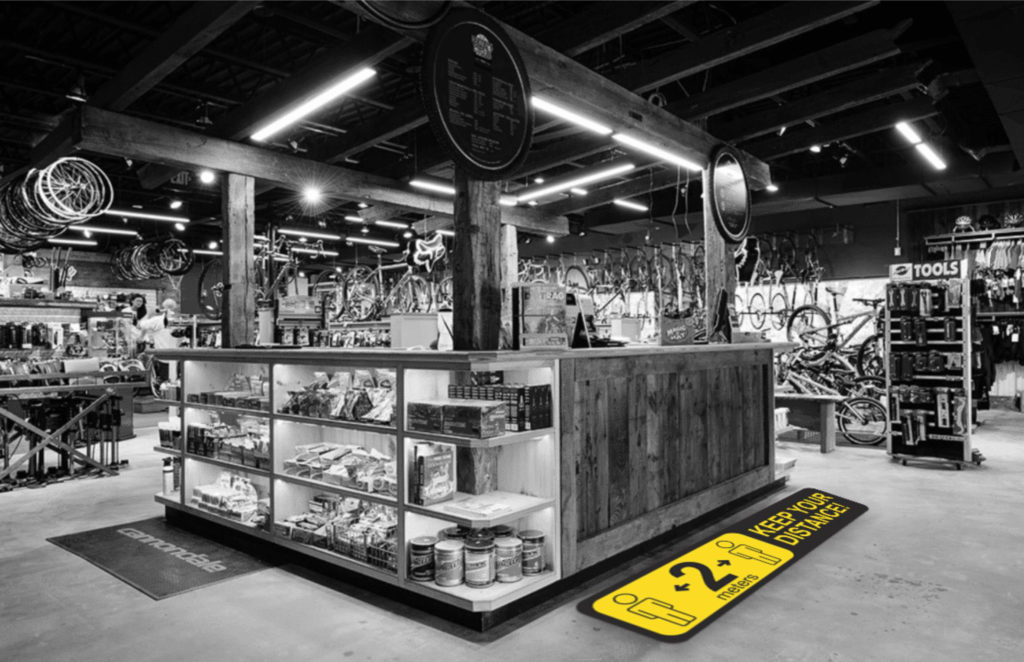
We make two kinds of floor graphics:
So, as an illustration, a long-term floor graphic of size 8 feet wide X 6 feet long should cost you:
8 feet X 6 feet X ₹150 = ₹7,200 + 18% GST
The smallest print is 4 x 4 ft and our minimum order is ₹3,000 + GST. Floor graphics work on smooth floors such as tiles, marble and granite, not on rough floors or paver blocks.
You can paste them yourself with soapy water and a squeegee. Installation in Pune is charged extra and quoted separately (on orders of ₹10,000 + GST and above; smaller jobs for a small extra charge).
To Implement This Unique Office Design Idea
Every large office is sure to have sections in the form of partitions, cubicles and glass-walled offices. And the job of the discerning architect is to mark these sections with plates, carrying the names of the occupants.
Nameplates were traditionally made from acid-etched metal sheets. But these were expensive and also took a whole lot of time to fabricate. Metal plates were also pretty heavy and Installing them was a pain. You had to nail them to the wall/door.
So people gradually started shifting to vinyl letters, sunboard prints and even tacky stickers. But these alternatives do not have the rich look and feel of a brushed metal nameplate and don’t do much to enhance our office room design.
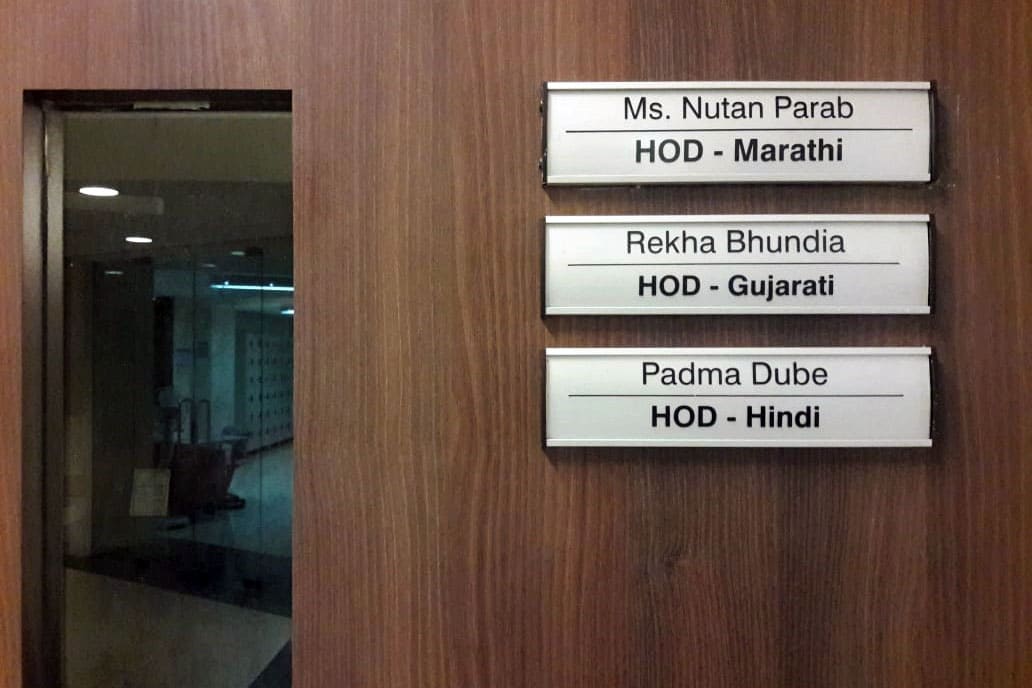
So, to address this gap, I’d like to recommend Laser-engraved, Gold / Silver Finish ABS Name Plates.
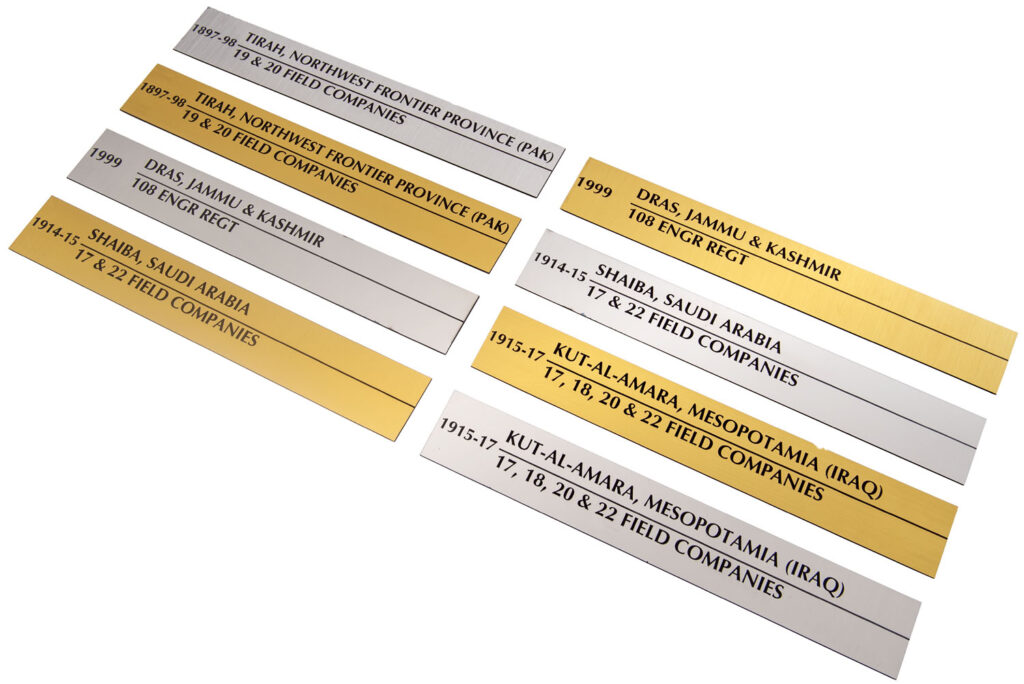
Strictly speaking, ABS sheets are not made of metal but a smooth, flat, 1.5 mm thick sheet of black plastic. This sheet also has a top coat of thin, metallic foil. We offer brushed gold, rose gold, silver, bronze and copper finishes.
Once you share the names of your employees, we use a high-precision laser engraving machine to etch the individual letters on top of these foiled plates.
The laser beam burns off the top layer (of foil) in the shape of the given name, to expose the black colour beneath.
And voilà, one laser-etched nameplate, ready.
Laser-engraved plates have a number of advantages over their metallic counterparts.
They are extremely light in weight and can be installed in a matter of seconds. We supply these plates with strong 3M double-sided tape on the back. So all you have to do is peel this tape and paste the sign at its intended location.
The foil on top has an rich brushed-metal finish. This ensures a rich and classy look for our office interiors.
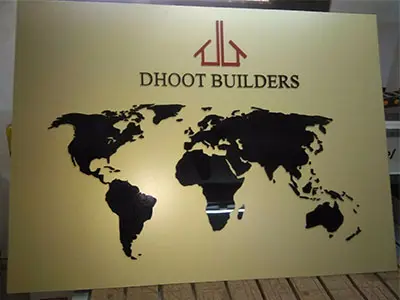
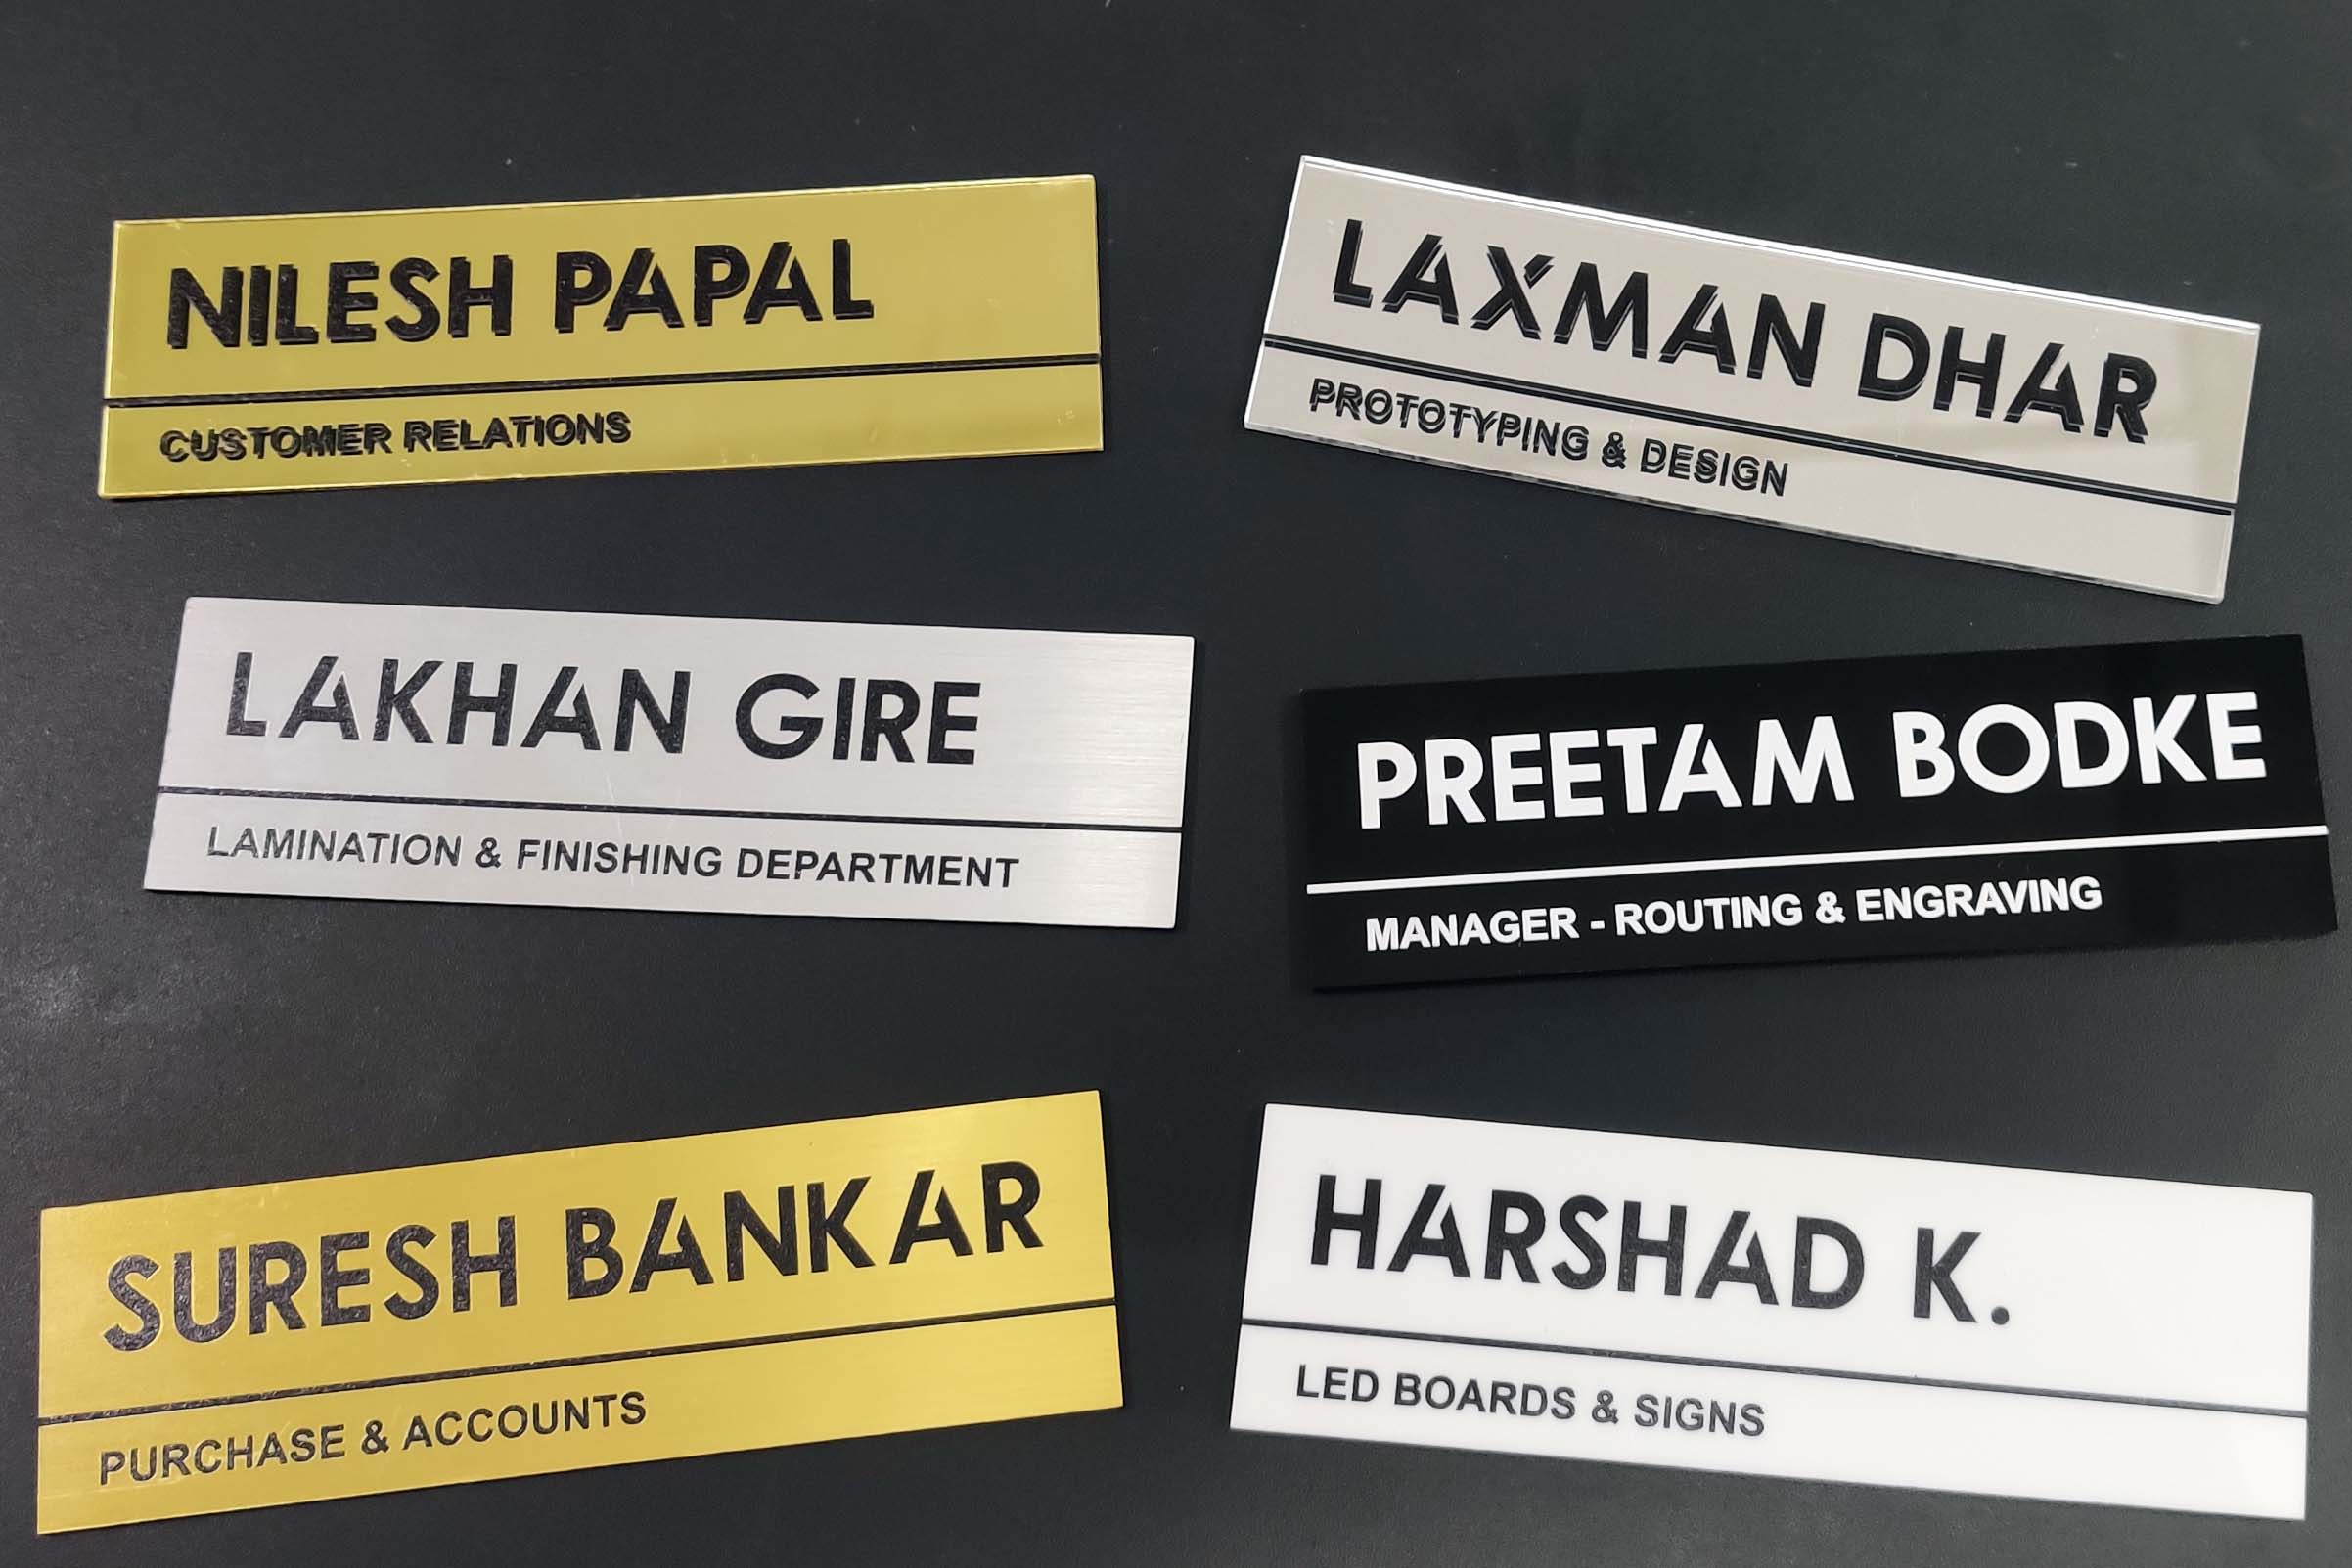
As a matter of fact, apart from gold and silver ply, we can make classy looking nameplates from black/white acrylic and even reflective mirror acrylic, as shown in the image below.
Metallic plates need to be polished on a regular basis to maintain their lustre and prevent oxidation. But our ABS plates are made of plastic, and are corrosion-free. They will not rust like regular metal nor do they require any kind of polishing/maintenance.
Finally, metal foiled plastic, ABS sheets cost a fraction of their full metal counterparts. So even if your employee were to leave, replacing the nameplates, is not going to affect your bottom line.
Ordering personalised nameplates for your office is not very difficult.
First, set a uniform size for all the nameplates in your office. Our standard sizes are 3 x 6 inches, 4 x 8 inches and 6 x 12 inches, and we can make custom sizes too.
Next, put in all your employee names (and official positions) in a spreadsheet. Once you mail this list to us, we take it from there and send you a digital proof first.
Our minimum order is ₹3,000 + GST. Plates of different sizes and names can be combined to reach it: for example, 10 plates of 4 x 8 inches cost ₹3,200 + GST.
So fill in as many names as possible in the spreadsheet. Heck, even commission icon plates for the loo, if necessary, to fill up the slack.
Our standard plates cost ₹180 (3 x 6 in), ₹320 (4 x 8 in) and ₹720 (6 x 12 in) each, and custom sizes cost ₹10 per square inch (all + 18% GST).
This price includes:
A 1.5 mm metallic-finish ABS sheet
Laser cutting and etching your design on the same
3M double-sided tape on the back, for pasting/installation
So, as an illustration, a custom plate of size 24 inches wide X 18 inches high should cost you:
24 inches X 18 inches X ₹10 = ₹4,320 + 18% GST
Please note that these costs do not include on-site installation.
Like this idea for office design? Need to implement the same for your workplace?
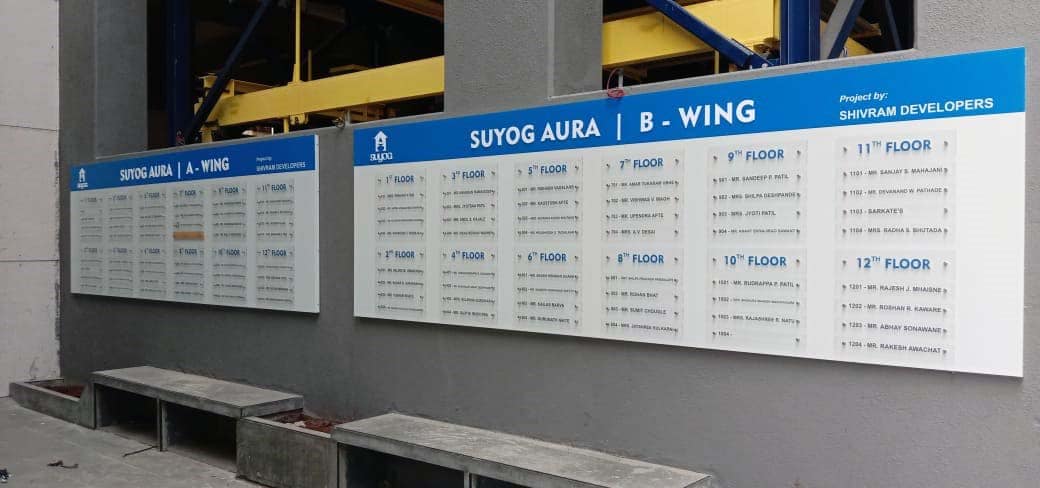
Large office buildings have tens of departments and hundreds of employees each engaged in different functions and seated at different locations. And as an interior designer, your job will be to communicate the location of all these different people to clients and visitors.
So an Office Name Directory in your lobby/reception is an absolute must.
One way to do this is to simply print all the names out on a sunboard sheet and paste the same on a wall. But this solution will look pretty basic. And what I want is for your directory board to look classy and impress all visitors arriving on our premises.
Moreover, in addition to good looks, the content on lobby boards are also constantly changing.
Employees come and go. Or get assigned to other departments. Corporate functions keep changing. And company structures get revamped. So what we need, is a mechanism by which the names on our lobby board can easily be updated and changed.
And to fulfil both these requirements of looks and functionality, I recommend Modular Name Directories & Signs for the lobbies and reception areas of corporate offices.

Modular Directory Boards as the name suggests, come in separate parts and components. These parts are then assembled to create the full name directory board. Also, individual parts can be readily replaced to allow for content change and updation.
Let’s have a quick look at how these modular signs are made.
Our modular sign has three main components that the interior designer needs to be aware of. These are:
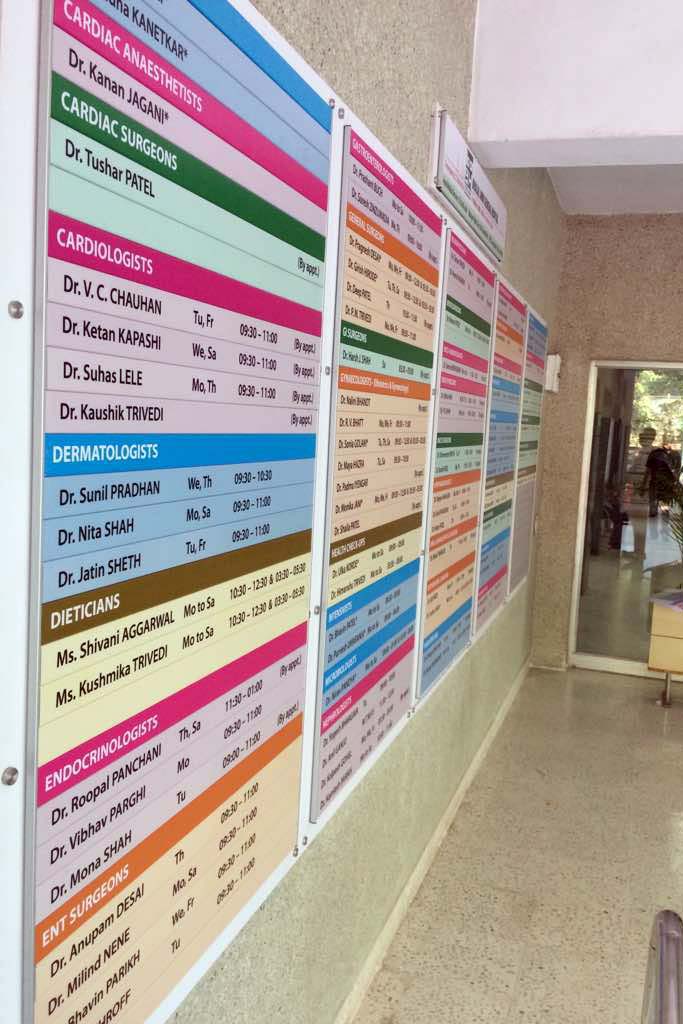
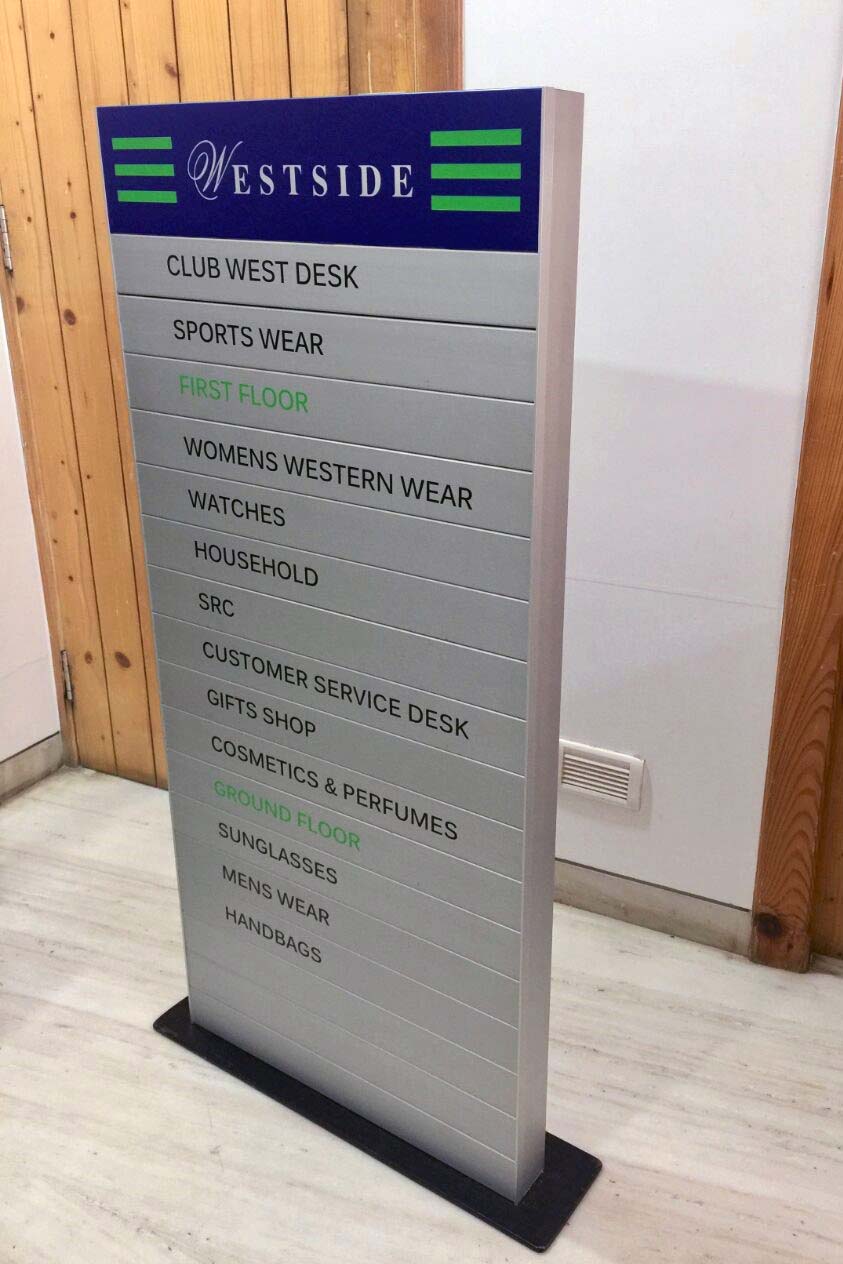
The actual names of the employees/departments, get printed on panels made of thin strips of aluminium. These individual panels are then slotted in place, to create the larger office lobby board.
These aluminium nameplates, also known as text strips, are available in differing heights.
This means that we can have a taller ‘header’ panel to show the name of the department. Panels of a lesser height are slotted beneath this header panel. These smaller height panels can carry the name of the individual employees working in that department.
Using differently sized (and differently coloured) header panels leads to easy categorisation of all the names on our board.
The front side of these panels is just a flat surface to enable printing. But on the reverse side, these panels have specialised grips. And these are what makes our office directory board such an elegant solution.
These grips allow for slotting of the individual plates in the larger frame. You can also very easily pop out and replace these plates without disturbing the rest of the signboard.
So if you need to change the name of a single employee, all you have to do is remove his nameplate and slot in a new one in the same place.
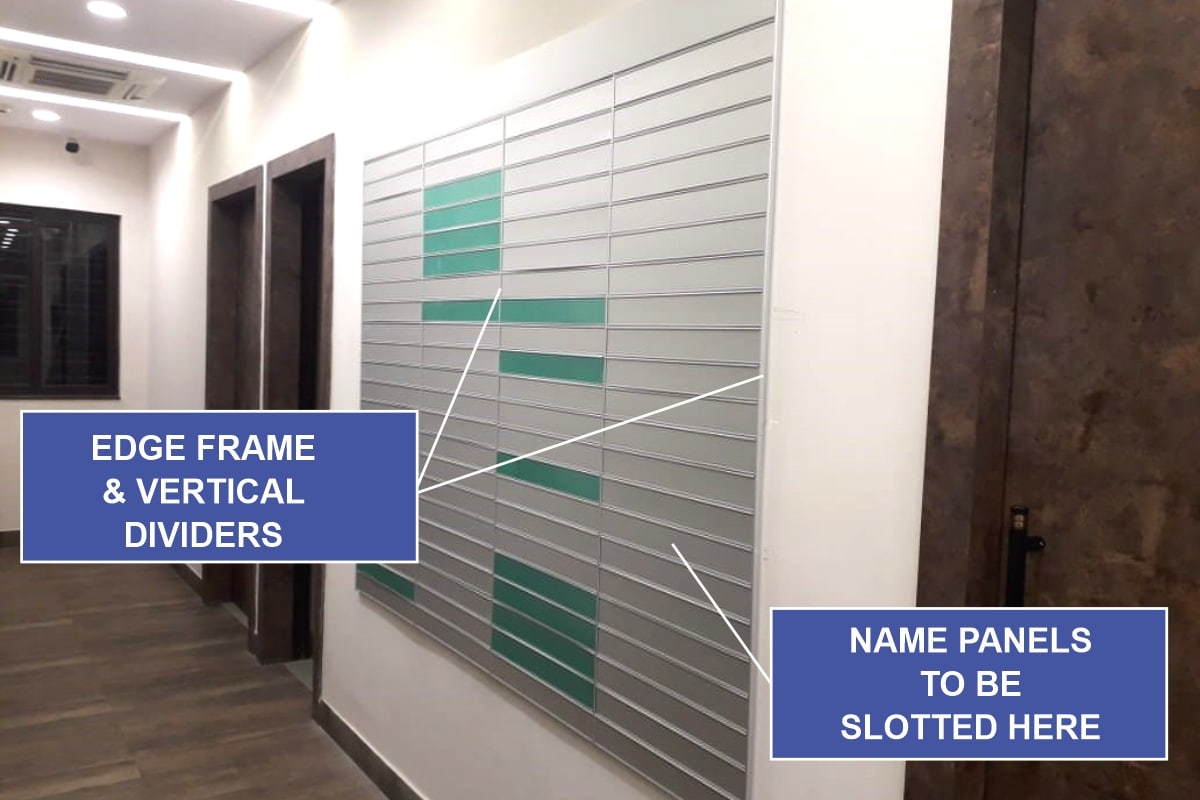
Our modular office directory board also has very sleek edges. These side profiles create the rectangular frame in which all the individual nameplates get assembled.
The aluminium edge profiles are extremely thin and weigh in at a height of less than an inch when viewed from the sides. So they give our frame a very sleek and compact look.
While edge profiles make for the outside boundary of our directory board frame, our modular signage also comes equipped with dividers. These dividers vertically separate individual columns of names.
And in addition to neatly spacing our signboard into uniform columns, these dividers also add to the strength of the overall frame.
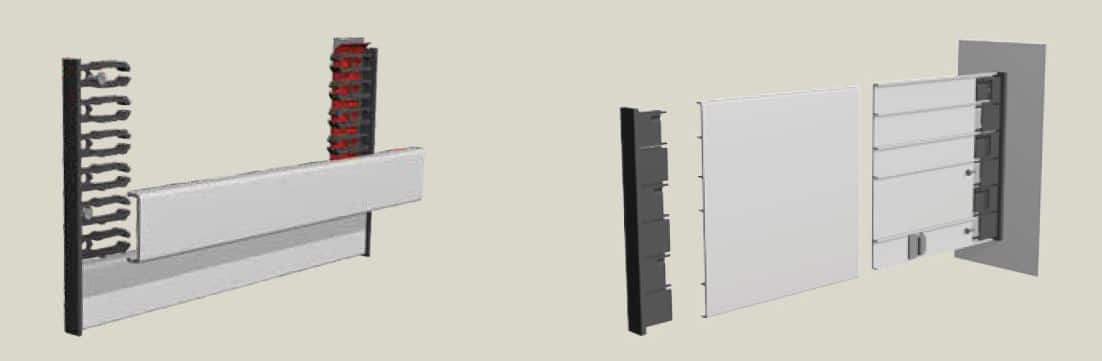
Finally, to hold all the nameplates, side profiles and dividers in place, the modular signboard has a base structure on which each of these components can be press-fitted.
While invisible to the casual viewer, this base structure is what holds everything in place. The structure is made of a sturdy plastic mesh with appropriately shaped slots. All the other parts have corresponding grips that fit into these slots.
So all you have to do is push the different components into the mesh structure, much like working with lego blocks.
Have a look at this image below, as an example. You can see end caps with clips made of plastic. Our name profiles have small extrusions on the back surface which get slotted into these clips. The end caps, in turn, hold the nameplates in place.
Apart from modular boards for offices, we design and build directory boards for housing societies, hospitals and clinics. We lay out the board, fabricate it in our own workshop and send you a proposal with the layout, materials and cost before we start.
A society lobby board lists every flat and its owner, usually floor by floor. A typical board has:
When a flat is sold or an owner changes, only that one name strip is replaced, not the whole board. We have made boards like this for Bravuria and Yashodhan Co-operative Housing Societies, among others.
For an entrance that looks good after dark too, the names can be laser-cut in white and gold acrylic or printed on acrylic panels with UV inks, with LEDs built into the board to light up the whole structure. The lobby board of Sankul Co-operative Housing Society is one example.
Hospitals and clinics need to show patients which doctors are available. Our OPD directory boards are made entirely of laser-cut acrylic. Each doctor’s name sits on a slide-in acrylic strip that can be changed, and a small sliding window next to every name shows whether the doctor is IN or OUT, so patients can see at a glance who is available.
Every directory board is made to suit your lobby and your list of names, so prices are on request.
The above descriptions may have scared you into thinking that a directory board project is pretty complex. But you need not worry. All you have to do is take two simple steps to start this process.
Measure the wall on which you plan to fix the board. Then arrive at an approximate dimension for the outside frame of your sign. You need not worry too much about accuracy.
We provide the exact dimensions in the layout we create for you. But you do need to give us a rough idea of what you have in mind.
Type in all the names and departments in a spreadsheet. Add in some blank spaces for new employees or information that may be updated in the future.
We treat each department and name as an individual plate that has to be fitted in the larger signboard.
Armed with the full-frame size and the number of nameplates that have to be included in the lobby board, we can give you a rough sketch of what the final job will look like.
Our directory boards are infinitely customisable. They have to be so, to cater to corporate offices having different requirements.
For example, we can fabricate a modular board to carry four, forty or even more name panels.
Different offices have different numbers of departments and sub-departments. Again, individual name panels may have varying heights and sizes. And the directory board needs to be properly configured to reflect all of this information.
So, as signmakers, we need to factor in each of these varying specifications before we can arrive at a meaningful quote, so all our directory boards are priced on request.
If you need costings for your name/directory board project, do reach out to us. Mail us all your employee names in an excel file along with the departments they belong to. Also, be sure to specify the size of the wall, on which the board is going to be fitted.
And we’ll get back to you with a proposal for the job. Installation in Pune is quoted separately; outside Pune, boards are shipped with the shipping cost charged extra, and we tell you the cost before dispatch.
By now, you probably realised a few things about branding your office interiors. Namely…
01
It is pretty easy to personalise your office interiors with your own designs or corporate colours
02
Doing the above will definitely make your workplace a more fun place for your employees
03
And most importantly, it does not cost an arm and a leg to achieve all this
A few good designs are all you need, to take your wall and glass branding projects ahead. And if you need a designer, have a look at our list of favourite Pune-based designers.
The 3D acrylic logo boards are also a pretty straightforward solution. To make them happen, all you have to do is mail your logo file and preferred dimensions to us.
Nameplates and directory boards are absolute no brainers as well. Create a detailed excel file containing all your requirements, to commission the job. And we will take care of the rest.
Finally, I hope you enjoyed reading this post as much as I did, writing it.
And if it managed to get your creative juices flowing, or if it gave you some innovative ideas to personalise your workspace, I will consider my efforts well rewarded.
Do let me know which of these interior decoration tips were implemented by you. And be sure to share your own thoughts and ideas on this subject, in the comments section below.
Until then, Happy Decorating!
Drop us a line. Send us your query. And we’ll get back to you with solutions and answers.

Mitesh lives, mostly for Saturdays.
But when forced to work, you’ll find him heading Orchid Digitals – a printing press in Pune.
If it’s an emergency, try looking for him in the hills behind his house. You’ll almost certainly find him… lazing under a tree, with a book in hand.
For Snowball Natural & Pure Icecream in Wakad we put the universe on the ceiling: two 8 x 8 ft fabric light boxes, five round planet menu boards, a printed counter and gold mirror acrylic letters. Plus a guide to how fabric light boxes are built, how the print can be changed while the box stays, and a villain.
AMJ Land wanted its project name, Green’s, and its logo to glow from the top of a residential tower in Thergaon, Pune. We built the letters in 3 mm welded aluminium with Osram LEDs, bolted a steel frame into the building’s RCC beams and fixed everything from a gondola. Two years on, it’s still glowing.
A new Häagen-Dazs café in Sky City Mall, Borivali, gave us every sign in the store: lit 3D letters in English and Marathi, pink LED neon, a gallery wall of photo prints, made-to-design acrylic clocks and a vinyl-wrapped cupboard. Here’s how a Pune workshop got it all right, and up, overnight.